
Here is your FREE tutorial by Robert Cornelius!
The Robert Cornelius Method (Illustrative Look in Three Steps)
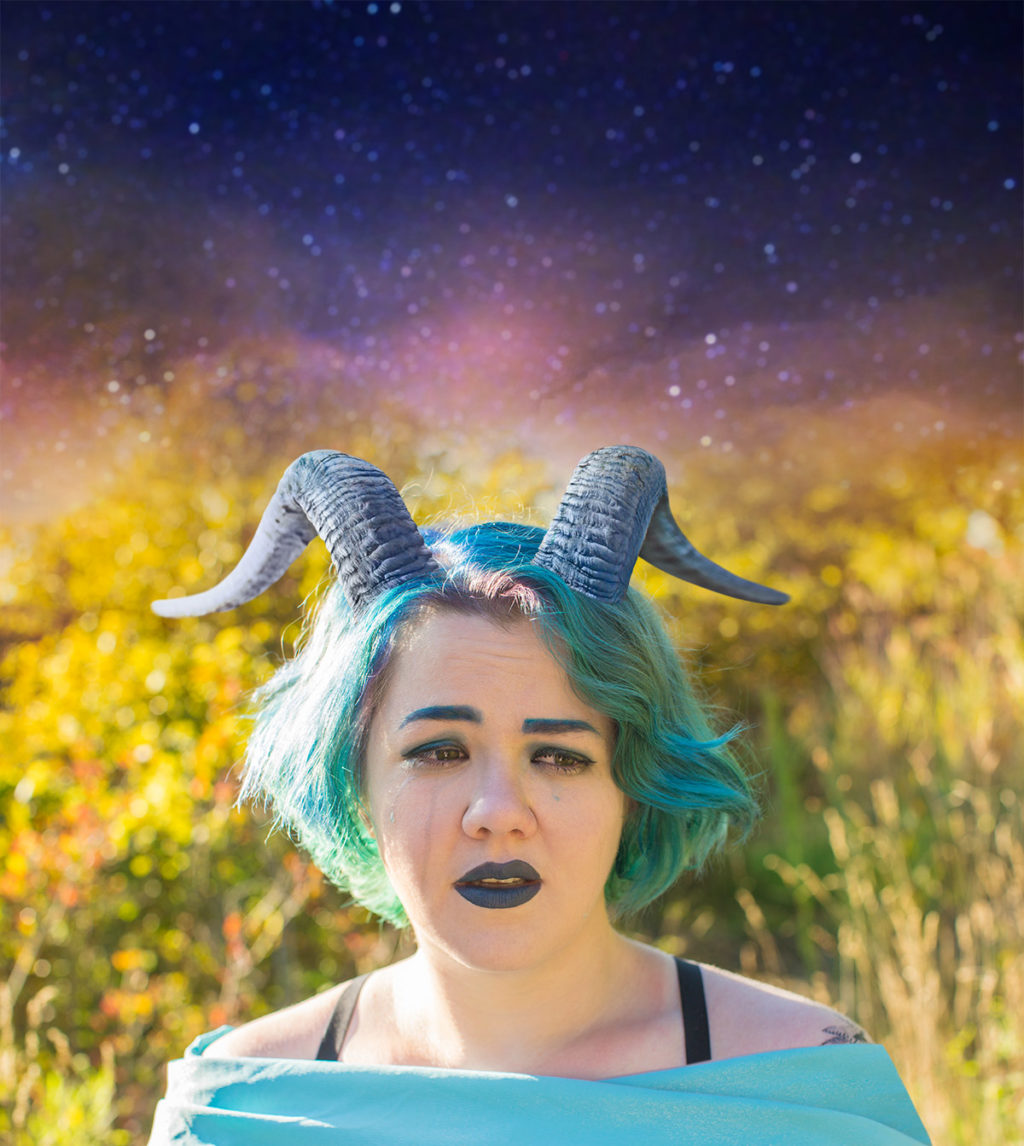
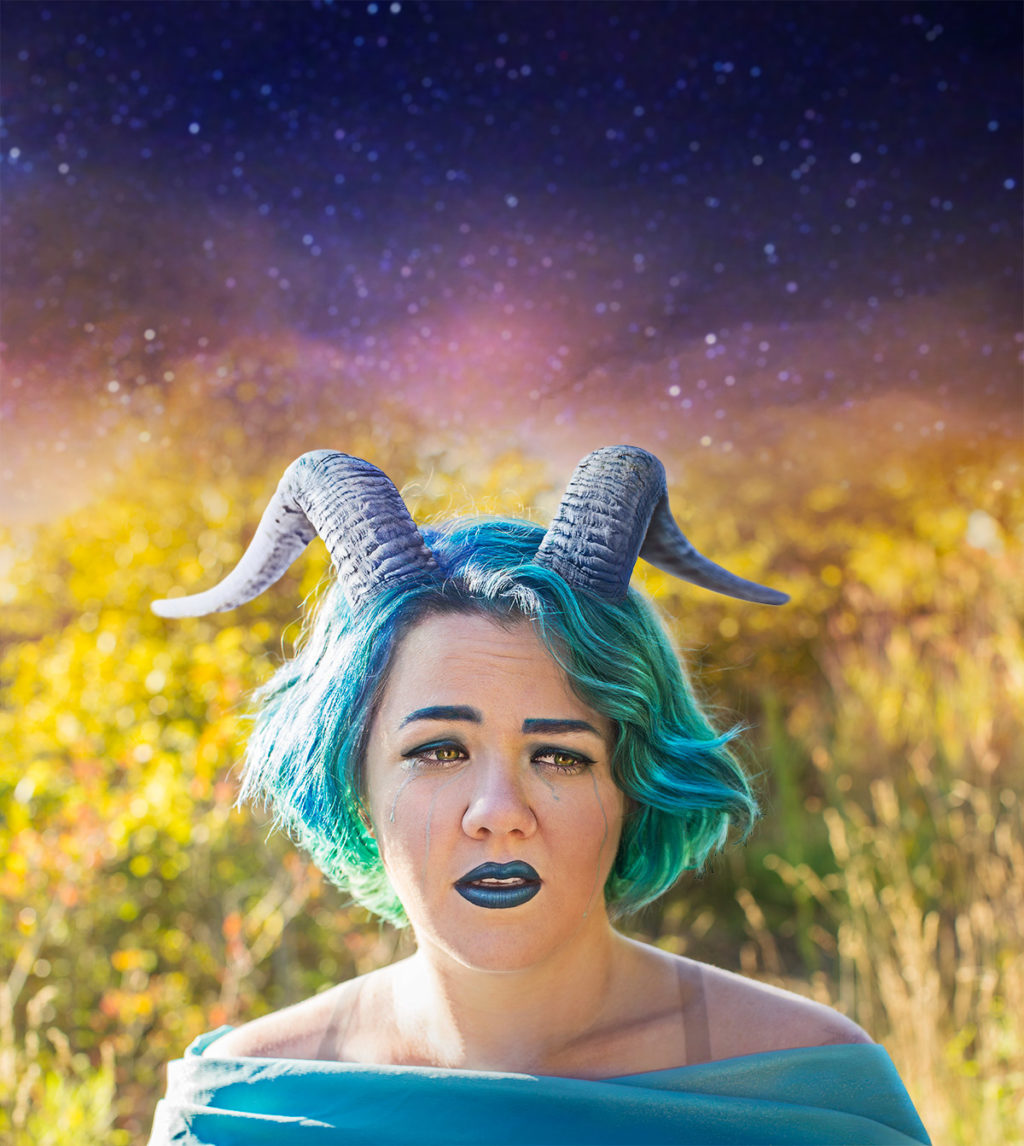
Robert Cornelius explains his three step process to transform his photos and compositions into final pieces that pop with details and guide the viewers eyes to those details.
Notice in this before and after comparison:
- The increased contrast between the large shadows and highlight areas of the model.
- The emphasized highlights, especially on the hair.
- The incredible details Robert brings out in the hair and eyes.


Want to watch Robert’s video showing this effect in detail?
Watch the six in-depth videos showing the exact process in Photoshop, step by step!
Yes, show me how!My Illustrative Look in Three Steps
By Robert Cornelius
Step 1: Shadows/Highlights Adjustment

The first step toward achieving my illustrative look is to develop my image a bit flatter: as in less contrast, higher shadows and lower highlights.
Then once I’ve done an overall retouching and masking of my subject (that is, if it’s a composite – but it’s me talking here, so odds are it is), I’ll duplicate my layer and run the Shadows/Highlights adjustment by going to Image > Adjustments > Shadows/Highlights.
I do this because it starts to push my image in the direction of an HDR (high dynamic range) look with more detail in the darks and lights of the image. Then I have more control to paint in and develop the lighting/details/look that I want.
Step 2: Three Layers of Painting

Layer 1. I usually start with a “Normal” blend mode layer (so just a new basic layer) and paint with black. This is where I start to draw attention away from areas I don’t want you to look by making them a bit darker. The normal blending mode goes over everything evenly and makes more realistic shadowed areas.
Layer 2. Next I’ll make another new layer and set it to the “Soft Light” blend mode. I’ll use this layer to start to shape my lighting by painting with black or white to accentuate highlights and shadows. “Soft Light” is not as harsh and contrasted as “Overlay,” so I use this one for overall broad shading and highlighting, like lightening cheek bones, darkening under the jawlines, and that sort of thing.
Layer 3. Next I’ll make an “Overlay” layer and take some time to really accentuate the tiny details. I’ll zoom way in and put a good amount of effort into shading and highlighting little details throughout the image. As I mentioned, “Overlay” is a harsher, more contrasted blending mode, so it does a great job of making the small details really pop.
Step 2a: Rinse and Repeat
After I’m happy with my first round of shadowing and highlighting, I’ll duplicate and merge my subject along with all of my paint layers. I’ll then turn off those layers so I still have them if I need them, but now I have a flat layer with all of the painting on it and I’ll run the Shadows/Highlights filter one more time to this new merged layer.
I don’t go as drastic this time. I just want to even it back out a tiny bit and blend together all the painting I did. I find that the mid-tone contrast slider at the bottom of the Shadows/Highlights adjustment window really seems to shine on this step, but don’t overdo it!
After that I’ll do one more round of painting using “Normal,” “Soft Light,” and “Overlay” layers. I’ll really take the time to pay attention to the tiny details in the areas where I want the audience to focus.
Step 3: High Pass Sharpening

Lastly, I’ll duplicate and merge again (“stamp visible”) and run a High Pass filter at a low setting and change the blending mode to “Overlay.” This is to crisp up and sharpen all those tiny details.
Then I do another High Pass layer, but this one at a much higher number and set it to “Soft Light” to increase the mid-tone contrast a little and add to the painterly look. This is another step that can definitely be overdone so I usually turn down my “Soft Light” layer’s opacity quite a bit and often mask the tiny detailed “Overlay” layer away from areas I don’t want as sharp.
Want to watch Robert perform this effect in Photoshop?
Watch the six in-depth videos showing the exact process in Photoshop, step by step!
Yes, show me how!