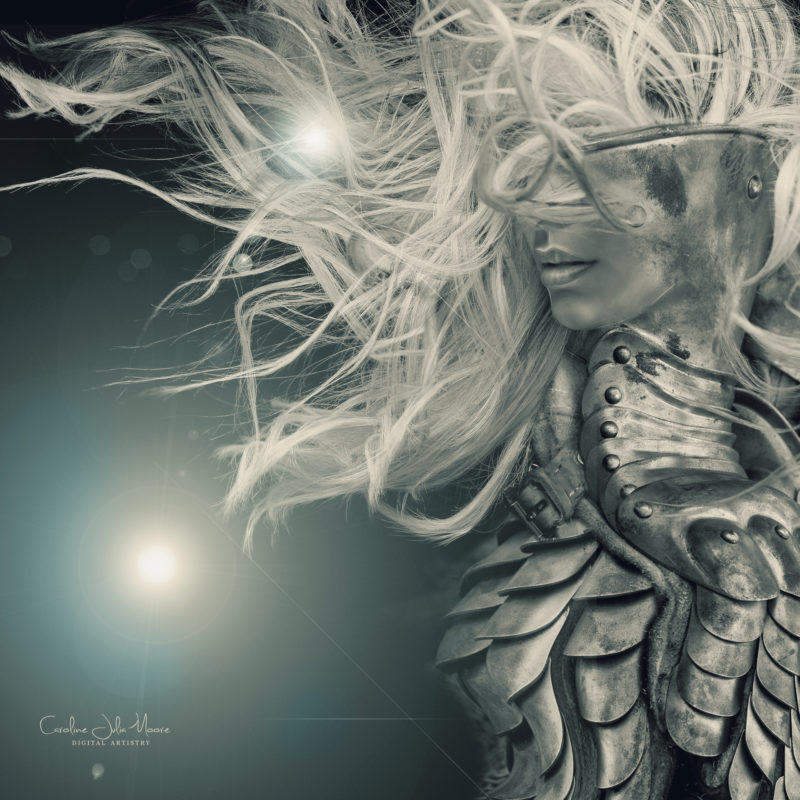
I Am Strength by Caroline Julia Moore

In this Photoshop tutorial, Caroline Julia Moore walks you through the creation of her piece, I Am Strength. See how she uses Blend Modes, Dodge & Burn, and accent points to perfect this surreal image. Resources are provided so that you can follow along with this step-by-step guide on your own, and then you can upload your image at the end of this tutorial to share the work you create and see what others have made also.
This tutorial contains both a written and video component. There is also a speed edit for you to enjoy.
Final Image:

Access this tutorial, plus 143 more: Join Base Camp!
Access our entire library of Base Camp Photoshop tutorials for life!
Join Base Camp!Already a Base Camp or Summit Member? Log in to view this!


Very interesting and complicated effect. I got lost in all the channel selections. Will have to try again. I posted my version.
Thank you very much! Great ! I have been waiting for this. New way to use channel masking for me. Very interesting.Tomorrow I try. Wonderful to learn so much new things. I am very grateful!
Thanks so much Caroline – I learned a lot! Posting my version soon.
WOW! This was great Caroline. Just what I needed to warm up after such a long absence and practice. For sure I learnt a couple of new things. Always love your tutorials.
Super, super cool. Learned a lot. Thank you 🙂
I submitted my piece for the December 10 Day Challenge. I’ll post a day early in future, knowing it might take 24 hours to appear. I used this option: “You can just create something that uses some techniques that you picked up in the tutorial that day.” I used the gloves images from the Hi and Low Res folders..and I used the information about lens flares which I learned from your excellent tutorial. Thanks! 🙂
Well that was my first attempt at anything like this. I have Photoshop elements and couldn’t find any color channels anywhere. So I did it my way. Feel good about it though.
This was not a piece of cake… I will have to study the channel-thing… !!! Posted anyway my work… thank you for the tutorial .. 🙂
Well, I tried but I don’t seem to be able to get past step 1 as when I go to the channels tab (which in my version of PS is next to the layers tab) and in Caroline’s words “Open up the Channels menu and deselect everything apart from Green. Select and copy this layer (Ctrl/Command A then C). Paste this onto a new layer (Ctrl/Cmd V)”, nothing happens in the layers panel – I am still left only with the locked background layer.
I do have some knowledge with PS, however am quite unfamiliar with using channels.
I’ve seen some submissions by some entrants to this challenge on the FB page – fabulous! 🙂
Penny, you have to return to the Layers menu and paste what you copied from the Channels menu to a new layer. This had me stumped too;).
Thanks LaDonna F!
sorry for the delay in replying. Yes, LaDonna is right. Once you have selected and copied the green channel then go back to your layers panel and paste. It should then be on a new layer. Sorry if this was not clear. Please let me know if you have any more problems
Ok, so after a little digging and a typo found by Sheila T., we’ve found the problem. I’ve corrected (Ctrl/Command A then C) to the correct (Ctrl/Command A then Ctrl/Command C). Thanks for your patience Penny, and thanks Sheila for shedding the needed light on this! And of course, thanks to Caroline for creating this incredible tutorial!
Thanks Andrei! 🙂
Mission accomplished…big sigh of relief! When I began this one I had high hopes of doing all 10 challenges. Weellll, my expectations are a bit more realistic now…lol :-). Thanks for the opportunity to participate. It will truly take a lifetime to complete all the tutorials available.
Thanks for the great tutorial. I can’t install LUT’s as I have CS5 version of photoshop so it forced me to be a little more creative to get the color tone close. Love the channels use for replicating hair layers!