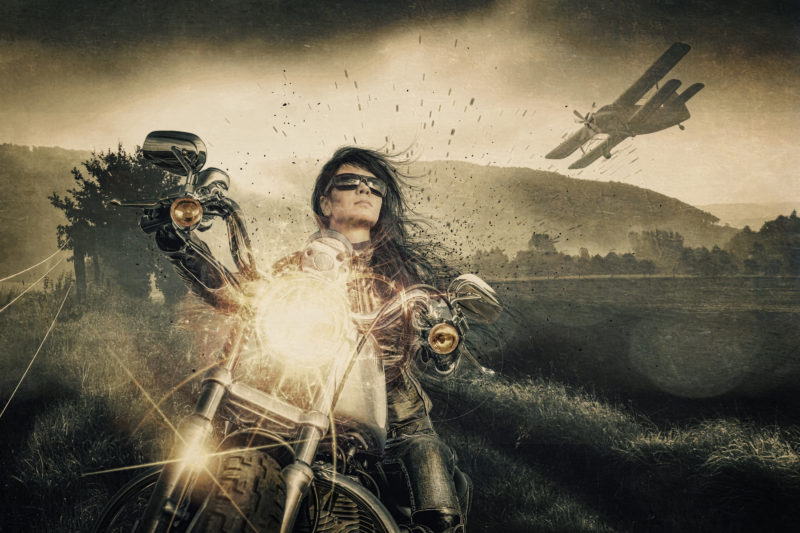
Wind Rider by Gail Edwards
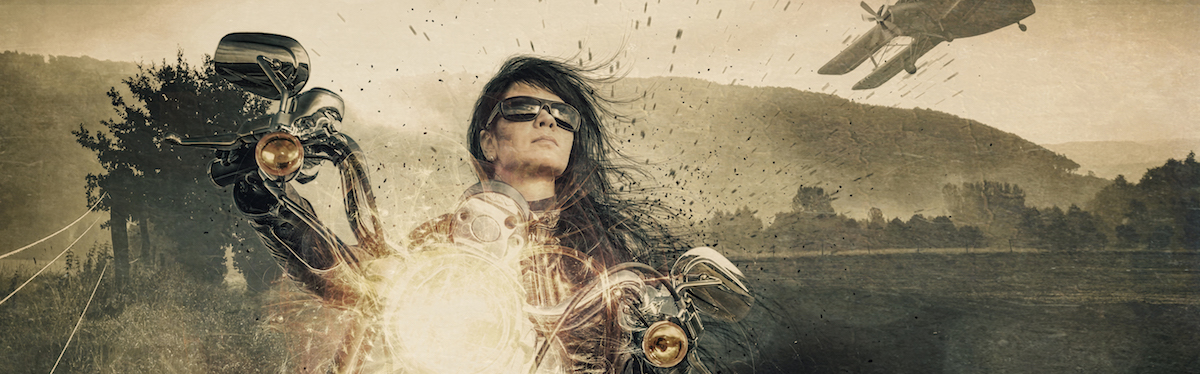
In this Photoshop tutorial, Gail Edwards presents the steps she used to create this image, Wind Rider. She brings the component images together, blurs and blends accordingly, adds light using fractals, and then dodges and burns an adds a few finishing touches to complete a convincing, grungy overall look.
This tutorial contains both a written and video component.
Final Image:
Access this tutorial, plus 143 more: Join Base Camp!
Access our entire library of Base Camp Photoshop tutorials for life!
Join Base Camp!Already a Base Camp or Summit Member? Log in to view this!


I always learn something from you. Thanks for the reminder to use 50% gray layer . How can we practice this one? I dont see the elements.
Thank you so much Susan!! I love the 50% gray layer! If you want to practice just grab similar elements that you have and away you go!! Always remember to just have fun!!
Fabulous tutorial, as always!
Thank you Kate!!
Thank you, really like your tutorials clear and precise .
Your welcome Liz! If there is anything in particular you would like to see just let me know.
Gail, I love your art and your tutorials are very easy to understand. Thank you for sharing.
You are very welcome Erika!! 🙂