Correcting Color Using Auto Options in Photoshop – Part 2

Level and Curve Adjustment Layers can be used to correct and color grade an image. They are closely related and extremely powerful. We will cover these in more detail when we look specifically at Color Grading. Put simply, when you use Levels and Curves, you are adjusting shadows, midtones and highlights. Levels are linear, with three control points; adjustments will affect all tones. Curves are geometric, giving you complete control on how you adjust tonality of an image; adjustments can be fine-tuned to specific regions of tone.
Final Image:

Remember that Photoshop determines tone using a range from 0 (black) to 255 (white). The numerical values of both Levels and Curves relate to this. You can manually adjust them to determine the effect on your image. The purpose of this article, however, is to show you some of the Auto options that are available within Levels and Curves. These are pre-set to achieve certain adjustments. As with Auto Tone, Contrast and Color, the adjustments are automated and indeed use the same algorithms. However, Auto Level and Curve Adjustments are saved onto their own layer and therefore are non-destructive. There are some extra options you can apply to each Auto adjustment. Further, when you have clicked ‘okay’ on the options, you can then go and refine the levels/curves manually. Let’s look at the same images as we did previously: the cat and the mountain images from Pixabay.
We will start with Levels. To ensure that your work is non-destructive, work on the adjustments on a new layer, rather than on the existing layer. Go to the Layer Menu -> New Adjustment Layer -> Levels. In the Levels box, you will see there is a tab for Auto. However, this is only one of the Auto options. You can access all of the options in two ways: by holding down the ALT key as you click on Auto, or by going into the menu options icon at the top right hand corner of the Levels box. The images below show the levels in the original images.
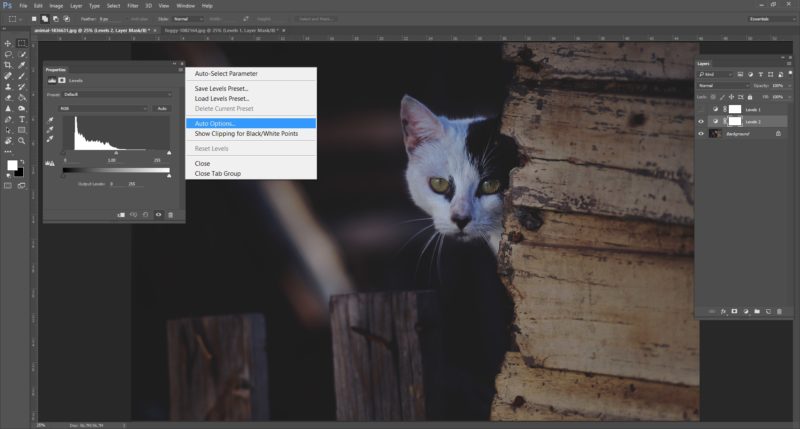
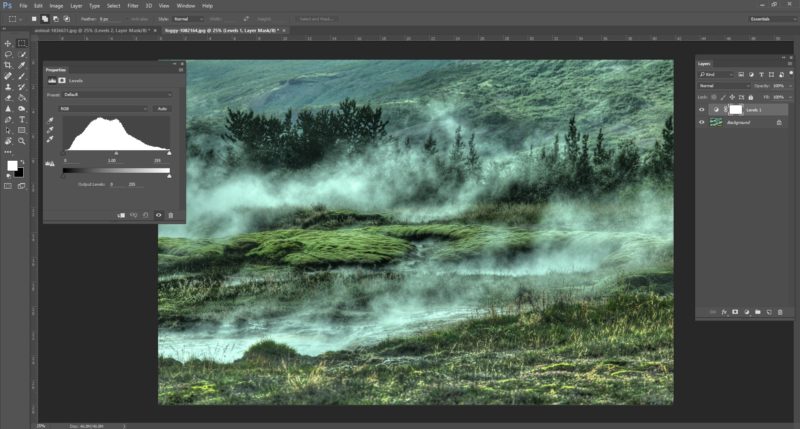
The ‘Auto’ default opening option is ‘Enhance Brightness And Contrast’. In this option, Photoshop analyzes the image and makes a decision on the how the tonal array should be adjusted.
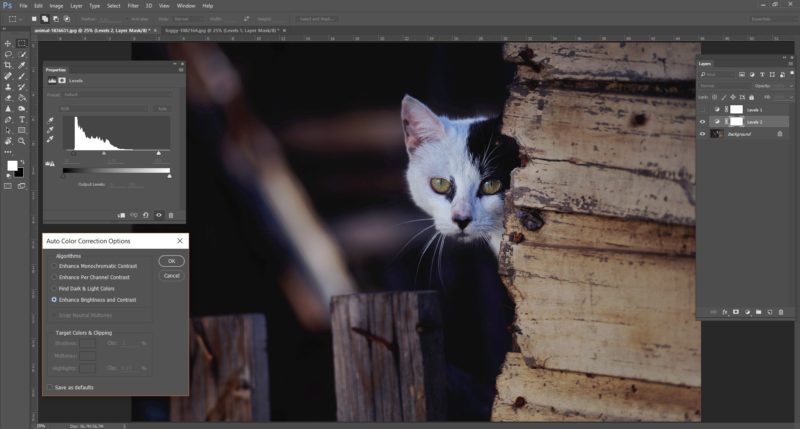
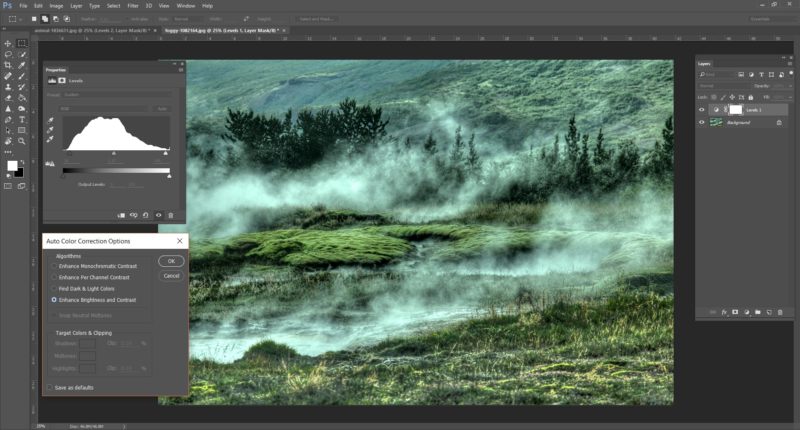
Enhance Monochromatic Contrast’ applies the same changes to all three RGB Channels. The light areas appear lighter and the dark areas darker but overall color is preserved. This option uses the same algorithm as Auto Contrast.
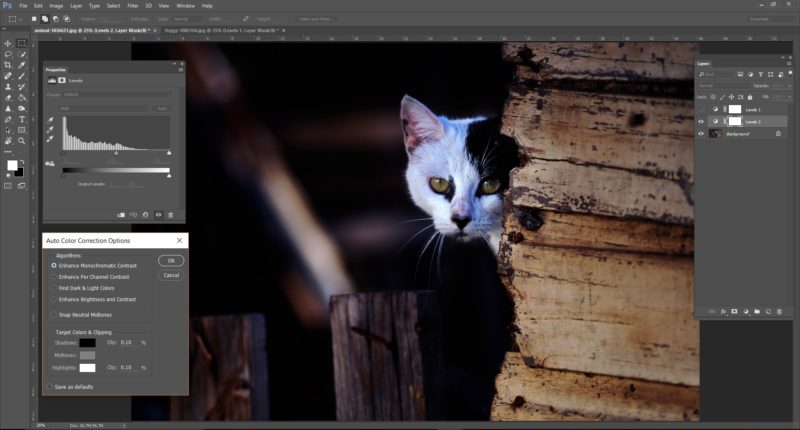
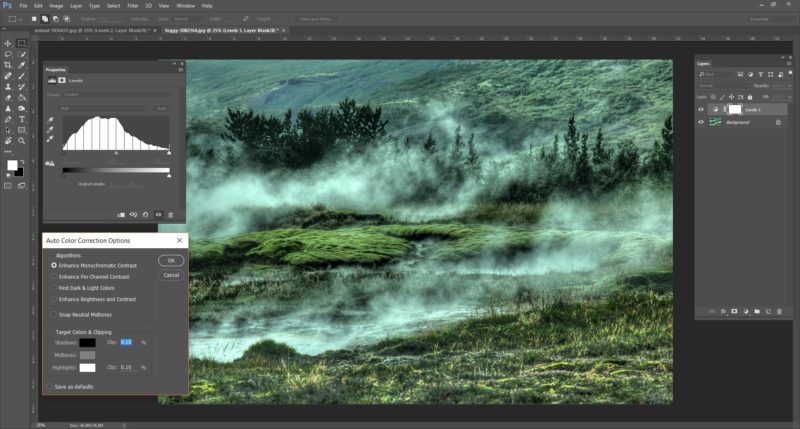
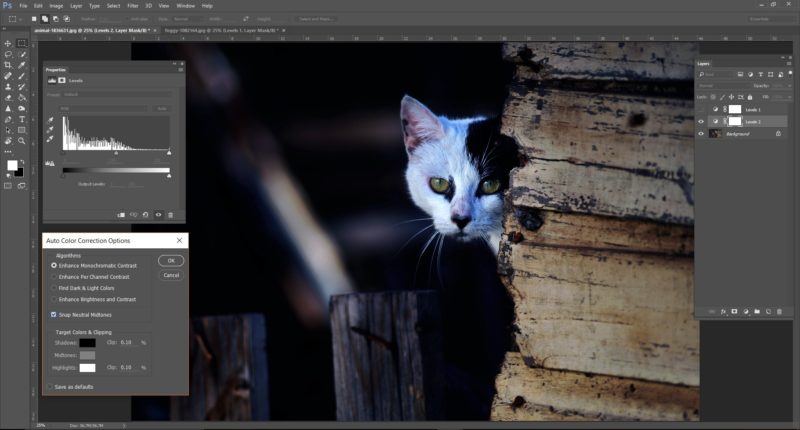
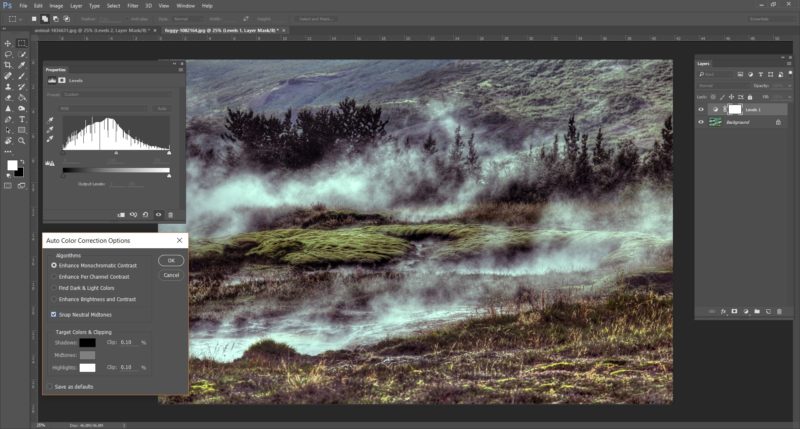
There is an option to Snap Neutral Midtones. It uses the Auto Color algorithm. Photoshop determines a near neutral color in an image and then adjusts the midtones (gamma) to make the color neutral. Whilst this can cause color shift, it may produce an effect that you like.
Enhance Per Channel Contrast’ adjusts each Channel separately, often altering the color balance. Photoshop determines the best clipping of light and dark for red, green, and blue individually. This option uses the same algorithm as Auto Tone. It can, however, introduce unwanted color casts to an image.
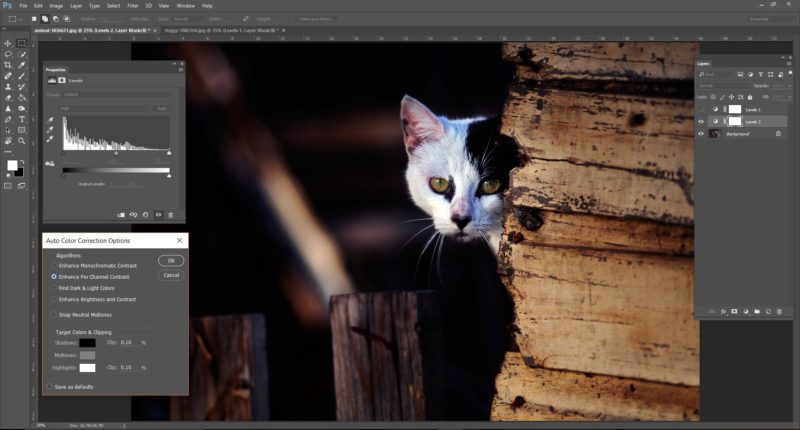
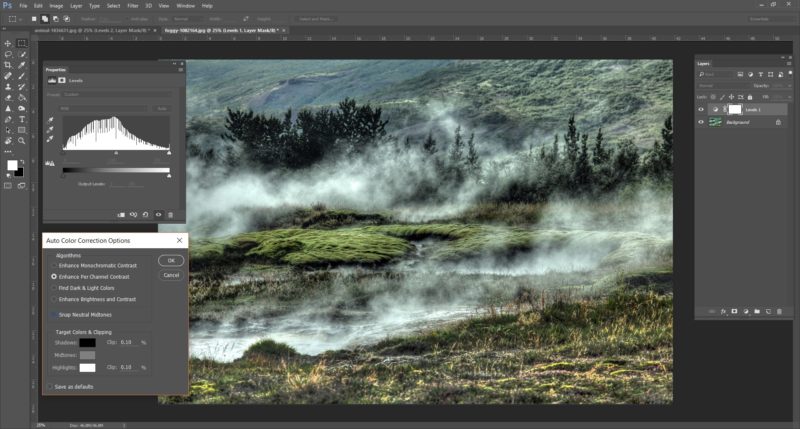
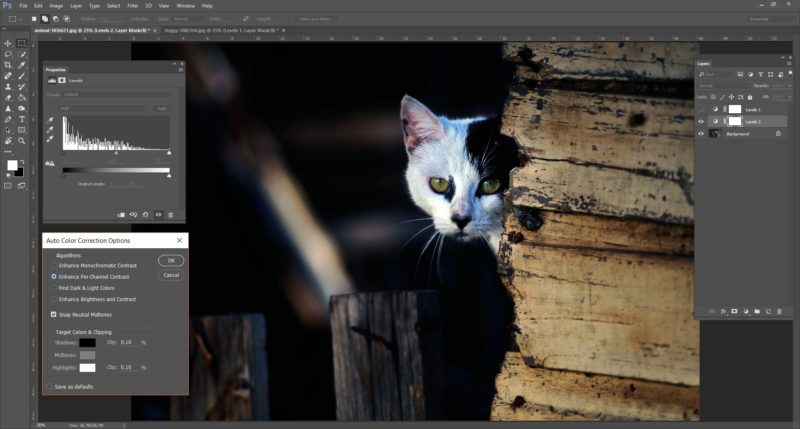
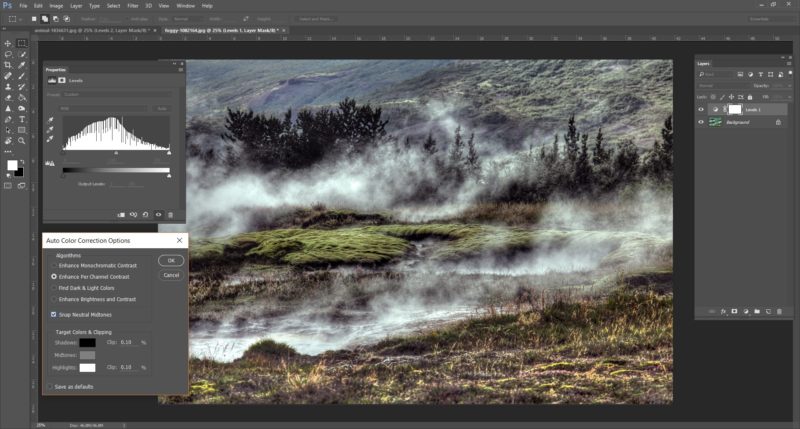
You can add the option ‘Snap Neutral Midtones’.
Find Dark and Light Colors’ locates the average lightest and darkest pixels across the whole image. These are then used to maximize contrast whilst minimizing the amount of clipping. This option uses the same algorithm as Auto Color.
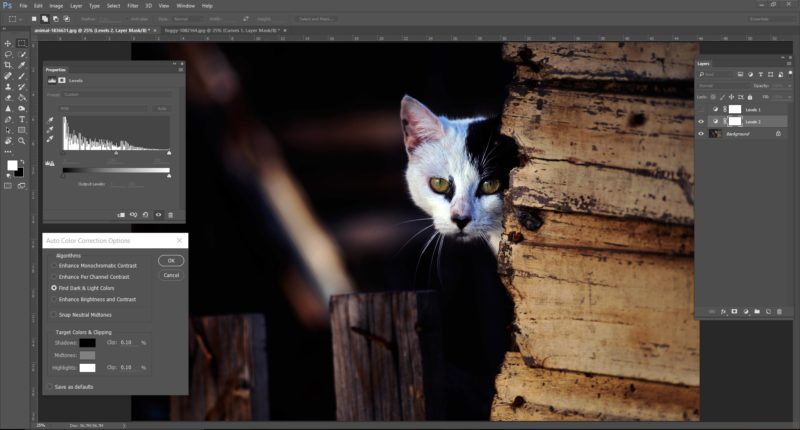
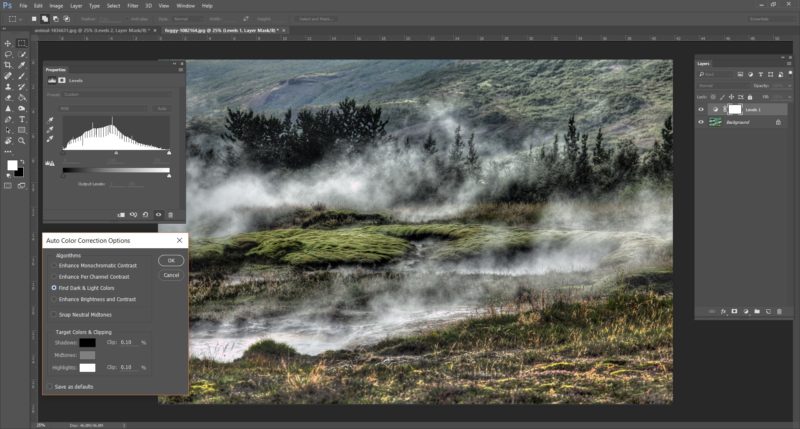
And with ‘Snap Neutral Midtones:
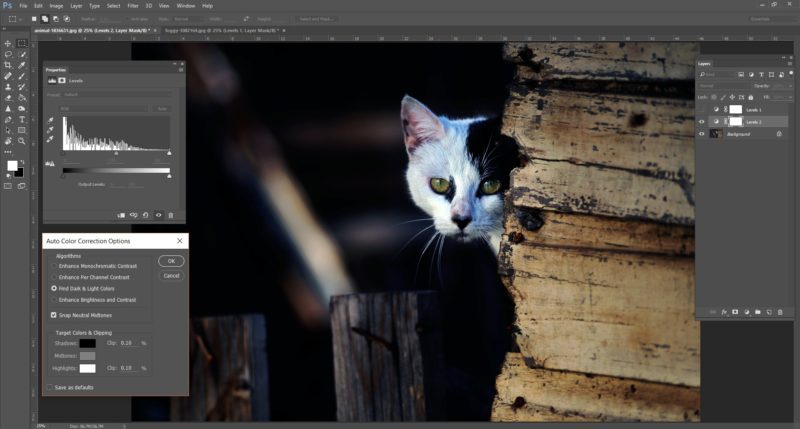
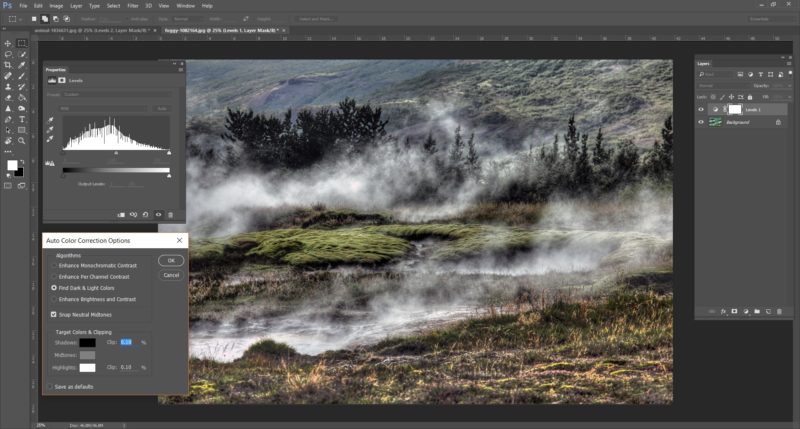
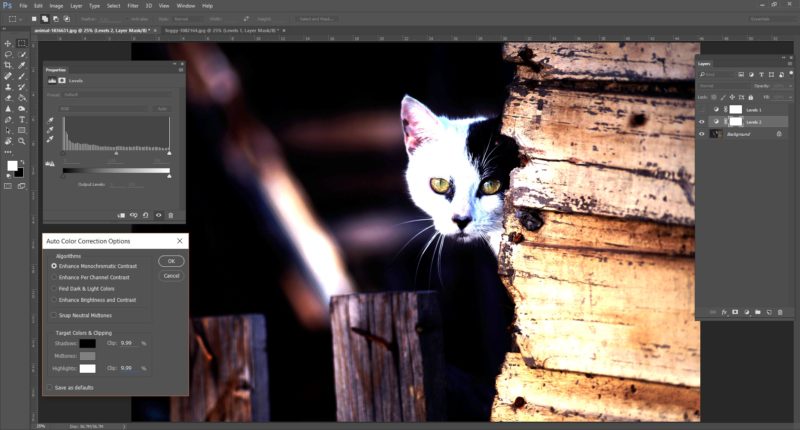
Notice that for all but the default, ‘Enhance Brightness and Contrast’, there is an option ‘Target Colors & Clipping’. This specifies the percentage to clip white and black pixels. The default is 0.1%; in other words, the 1st 0.1% of the highest white or black pixels are ignored. You can alter this default if you want to, applying a value between 0 and 9.99% (although generally it is recommended to stay between 0 and 1%). To illustrate the point, the screenshot below shows an extreme example using the ‘Enhance Monochromatic Contrast’ option. The levels have been clipped to ignore pixels brighter or darker than 9.99%. Narrowing this range has had the most noticeable effect on bright areas.
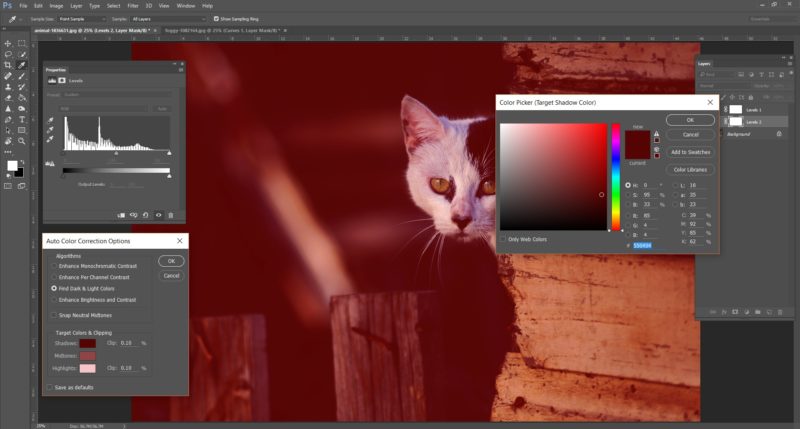
You can also adjust the Shadows, Midtones, and Highlights by clicking on each of the swatches in turn and selecting a color from the color box or an existing color using the eyedropper on your image. The screenshot below shows an extreme example to illustrate the point.
Let’s take a look at the Auto Curves options. These use the same algorithms as Auto Levels, applied to Curves. The same options are available and you can adjust using the options as described above. The ‘Auto’ default opening option is ‘Enhance Brightness And Contrast’.
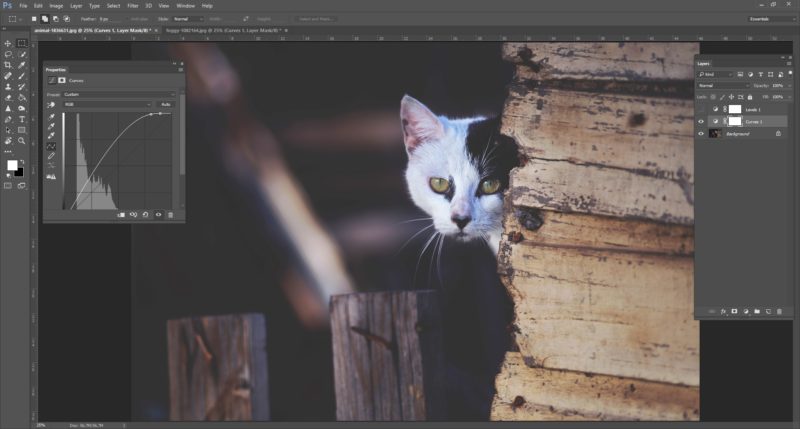
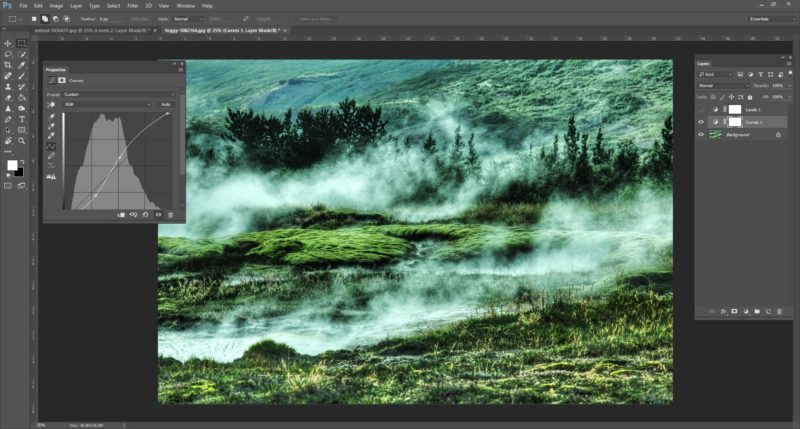
Here is the ‘Enhance Monochromatic Contrast’ option:
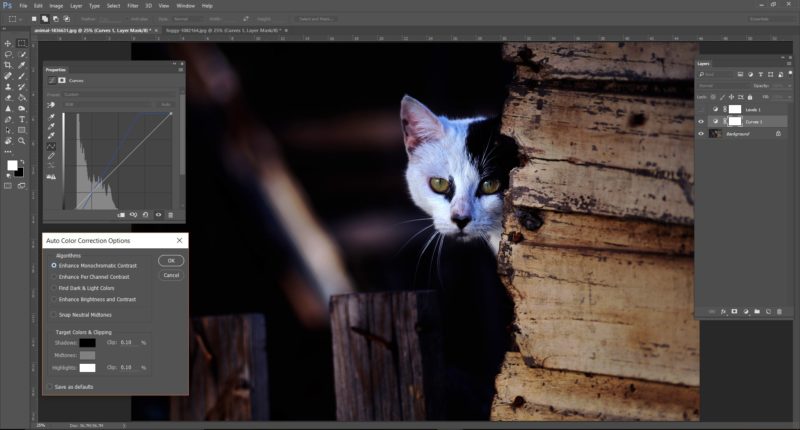
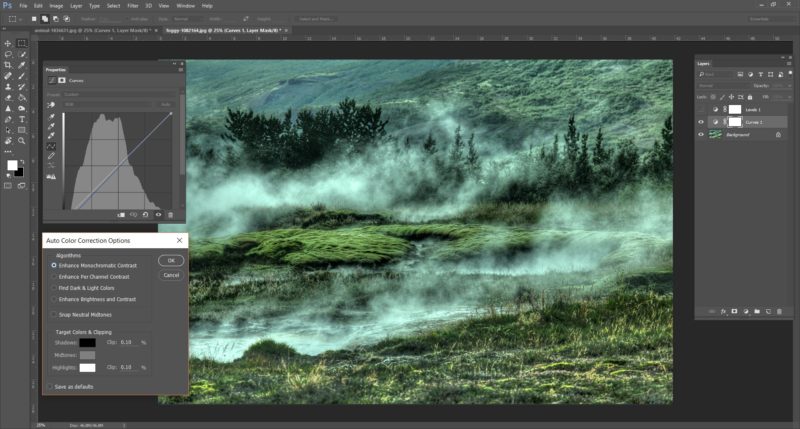
With Snap Neutral Midtones:
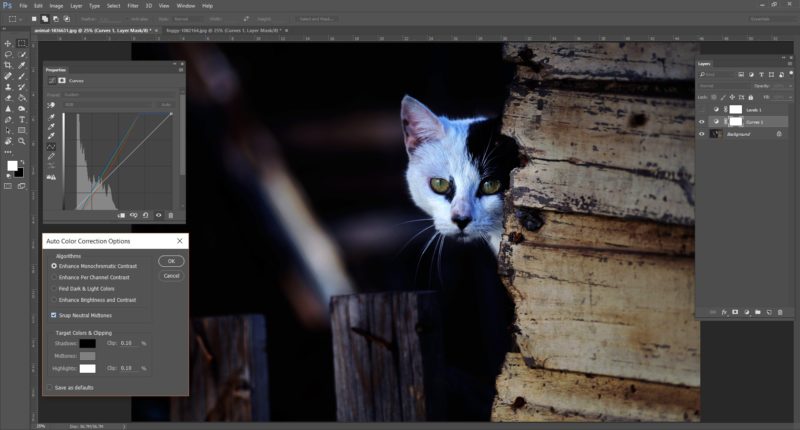
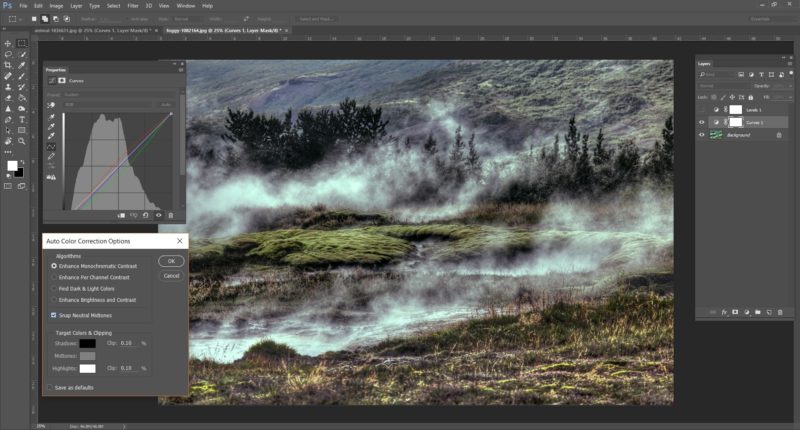
The next screenshots show the ‘Enhance Per Channel Contrast’ option:
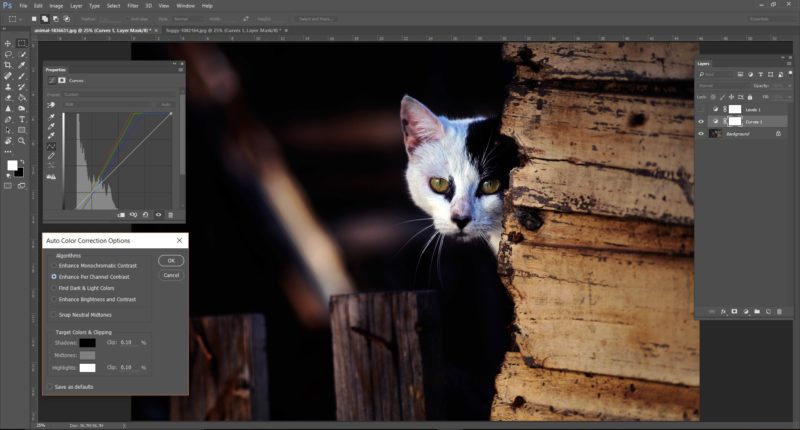
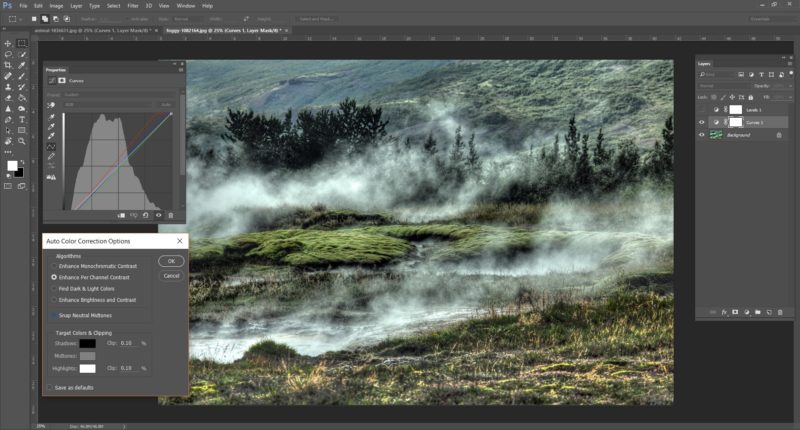
With ‘Snap Neutral Midtones’ added:
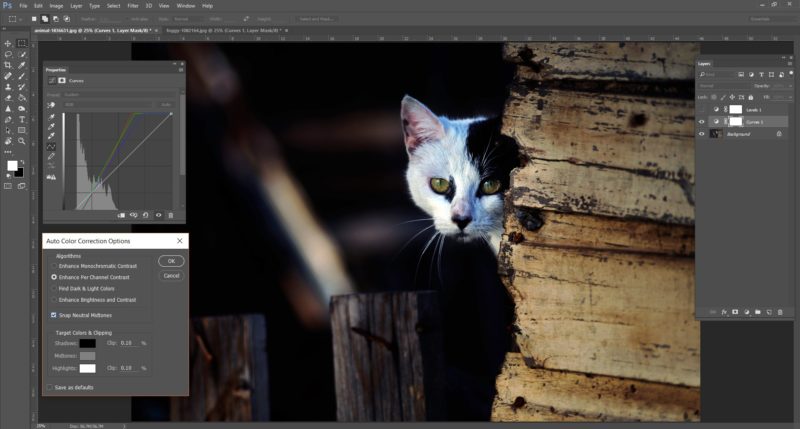
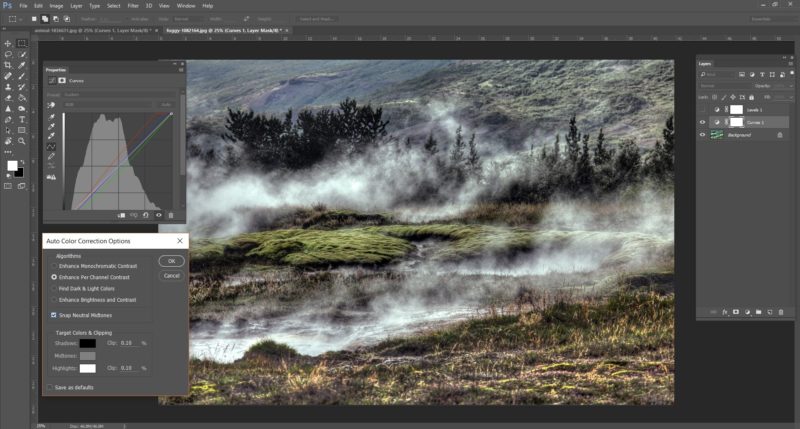
Finally, the ‘Find Dark and Light Colors’ option:
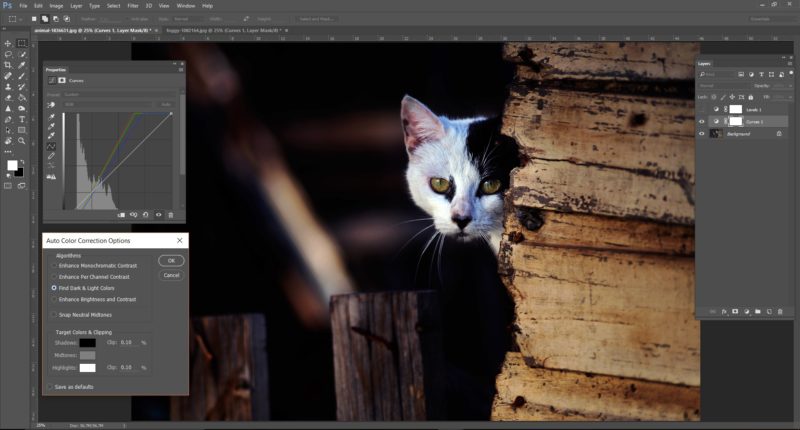
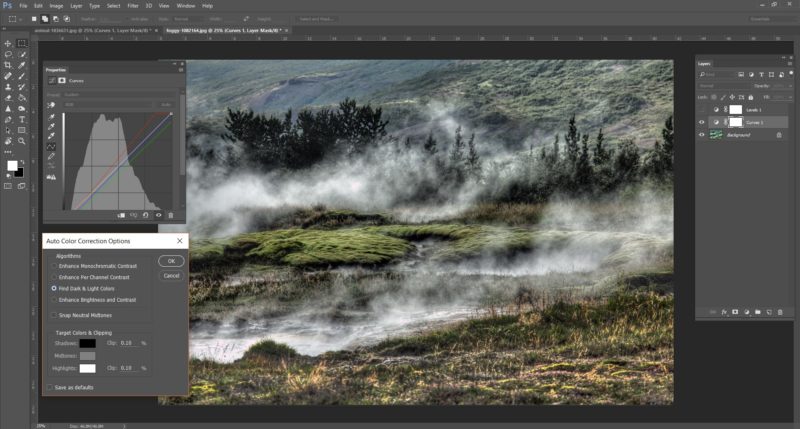
Added ‘Snap Neutral Midtones’:
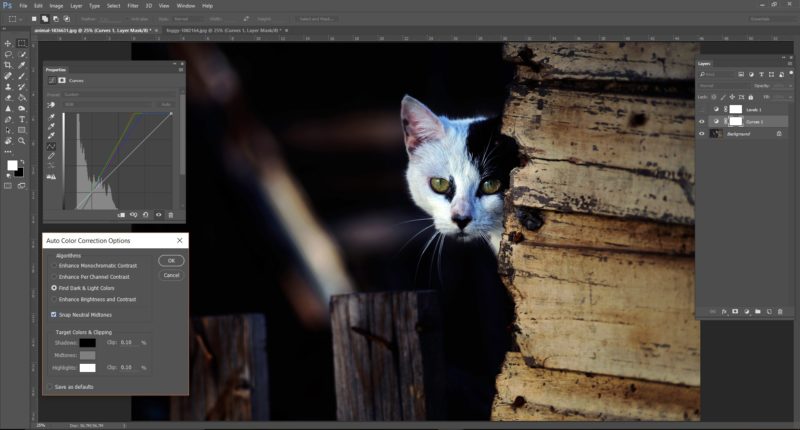
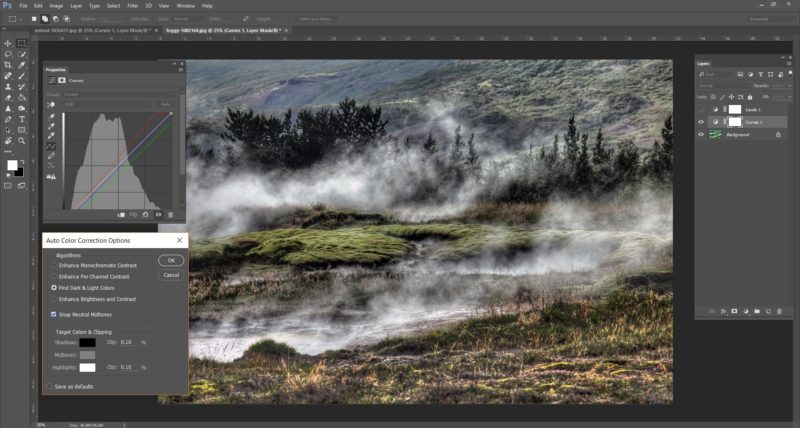
When you look at the Levels and Curves from these examples, you can clearly see that the results are different depending on your original image. Even though the same underlying algorithms are used as in Auto Contrast, Color, and Tone, the Auto options for Levels and Curves are more adaptable. They can be a useful starting point to then further refine your images, especially if you are not sure where to begin with improving and correcting your image. Perhaps the most important difference between the Auto options here and those described in the previous article is that they are non-destructive. Just remember to apply the adjustments onto their own layer, rather than applying to your original image. Automatic color correction process provides convenience correcting color in just one click but there is an alternative way to correct color. You can use Photoshop complementary colors or opposite colors to correct color in no time. For more info follow this color correction tutorial and many more Photoshop Tutorials on PSD Stack.
Access this tutorial, plus 143 more: Join Base Camp!
Access our entire library of Base Camp Photoshop tutorials for life!
Join Base Camp!Already a Base Camp or Summit Member? Log in to view this!



good article…will return to it many times I think.
Thank you. I’m always thrilled to discover something new. Never knew about using Alt to give you more Auto options.
Thank you Caroline. This useful information was presented very clearly. I look forward to making more use of auto levels and curves in the future.
It is nice to know a bit of what is going on in the background when you click one of these Menu items, Thank you,
Learned something new!
Found this really useful and will certainly be using it has changed an image that I thought was pretty good into one that is pretty good