Use Fx to Create Realistic Shadows

One of the most important things in creating a photo-realistic composite is thinking about light and shadow. When you are composing a scene with different elements, lighting needs be believable. In this mini-tutorial we are going to look at how to add shadows to extracted people or object that you add to a background. We will be using the Fx option; Drop Shadow.
Before & After:
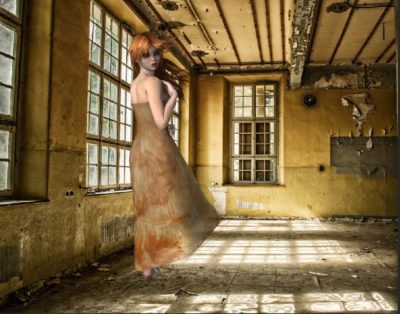
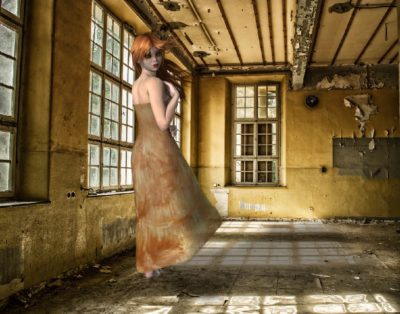
Below are the links on Pixabay for the images I am using, so that you can download and practice on them.
Fairy Girl
Room
I am going to start by placing the png of the woman into the photograph of the room. Click on the ‘Fx’ option at the bottom left hand of your layers panel and select ‘Drop Shadow’.
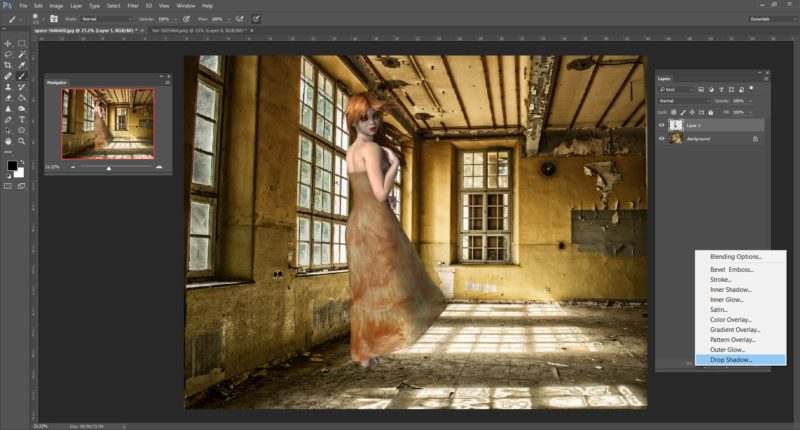
The default shadow color is usually black, but it is best to select a color form pre-existing shadows in your background image. Click on the color box to the right of the blend model option and use the eyedropper tool to select a color from your image (I have circled the sampled area I used in red).
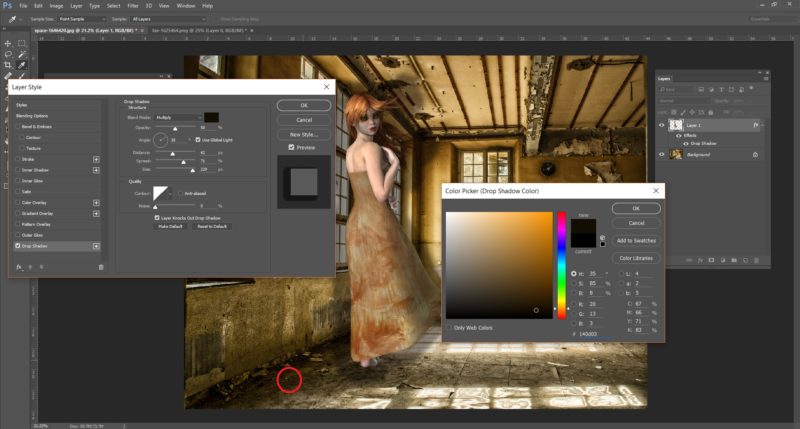
At this stage, it does not matter too much about the positioning of your shadow. The most important thing is to save the shadow effect onto its’ own, independent layer so that you can manipulate the shadow without affecting the source.
On your active layer, go into the menu options and select Layer, Layer Style, Create Layer.
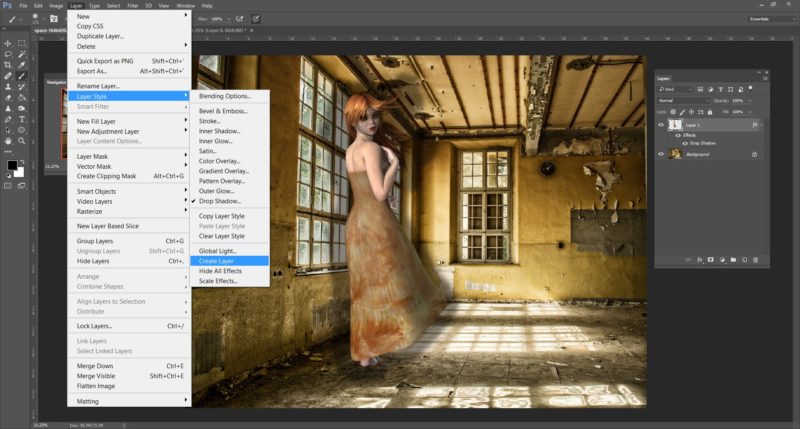
Your drop shadow is now on its’ own layer. Any changes you make will affect only the shadow and not your source.
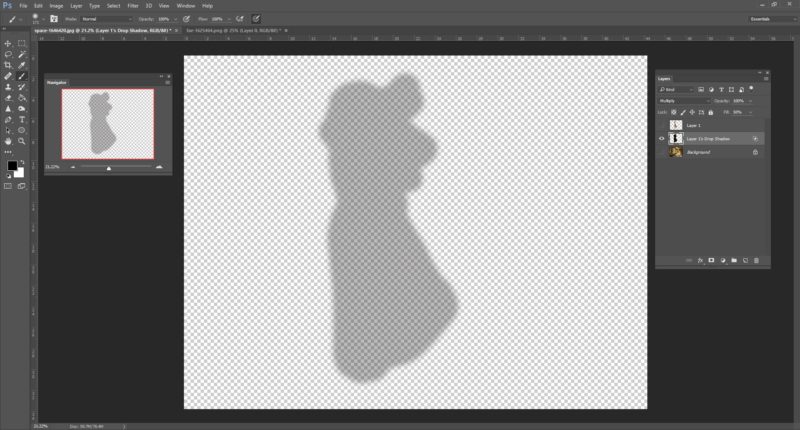
When you are adding shadow, you need to think about the where the light source is coming from and how this will affect shadows. In this example the light source is coming through the windows and the woman’s shadow will therefore fall on the ground to the front of her.
With the shadow selected press CTRL T to Transform. This will select your working area. Right click the mouse key ad select Distort.
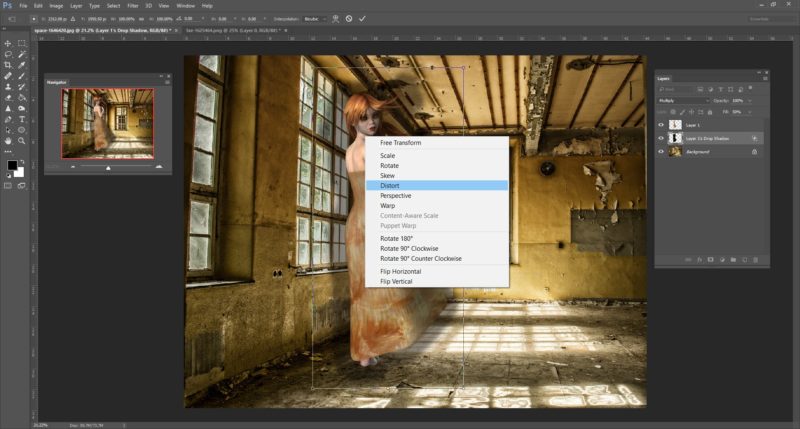
Move the shadow to the position you want. Here you can see I have anchored the starting point to her feet.
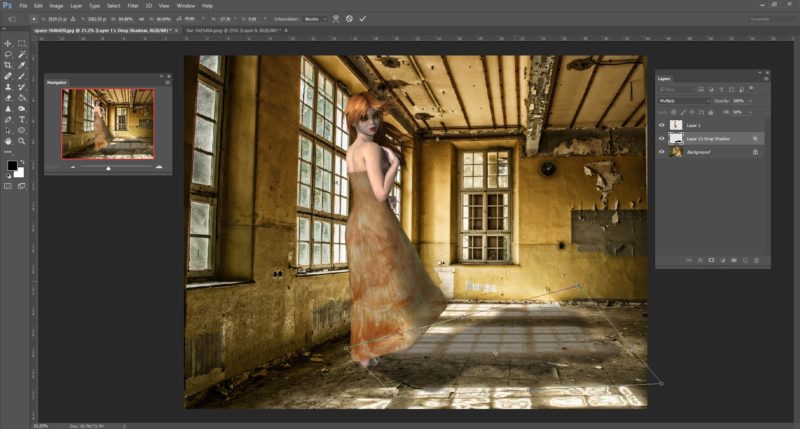
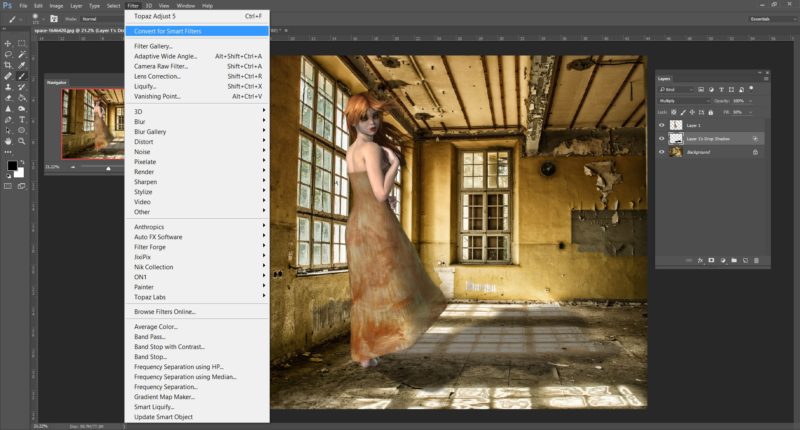
With the shadow in position, you can adjust it as you see fit. It is best to convert the layer into a Smart Object or Filter before applying any addition effects. This way you can modify your parameters at any point by double clicking on the effect layer.
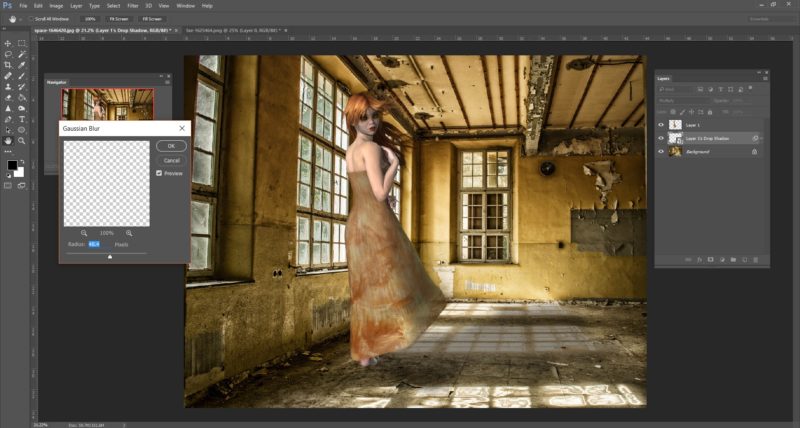
I applied a Gaussian Blur Filter to soften and blend the shadow further.
Learn More About Creating Shadows:
Go watch our full video tutorial on creating shadows.
Access this tutorial, plus 143 more: Join Base Camp!
Access our entire library of Base Camp Photoshop tutorials for life!
Join Base Camp!Already a Base Camp or Summit Member? Log in to view this!



Nice, simple tutorial. A couple of other things I do to make the shadows more realistic, is I change the blending mode of the layer to multiply, which allows the shadow blend in and darken anything in the background that it overlays (lighter on light colored surfaces, darker on darker surfaces.) Also, if the shadow is distanced somewhat, as it may be in this example, I’ll add a mask and on the more distant edge of the shadow (the furthest point of the shadow from the source subject creating the shadow) and with a large soft brush at 25% transparency and brush over the shadow. Shadows tend to dissipate, or weaken, the further the distance from the subject and the further away the light source is located. I’ll also adjust the transparency of the entire layer depending on how strong or weak I want the shadow to appear.
Great tutorial.
Thank you!
Great, simple tutorial and great advice in the comments. Thanks Caroline and others!
But your shadow doesn’t match any of the light sources. Should it not fall the same way and direction as the windows?