Sharpening and Bringing out Detail

During your creation process, you have probably wanted to sharpen either your entire image or just parts of it at some point. Here are some methods for sharpening and bringing out details in an image. These techniques were brought to my attention by Robert Cornelius in his interview and tutorials on Shift Art.
Before & After:

Let’s start by sharpening.
Open the cat image in Photoshop, which you can download it here

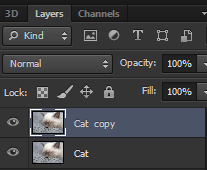
The first step is to duplicate the layer you wish to sharpen by pressing Ctrl/CMD+J.

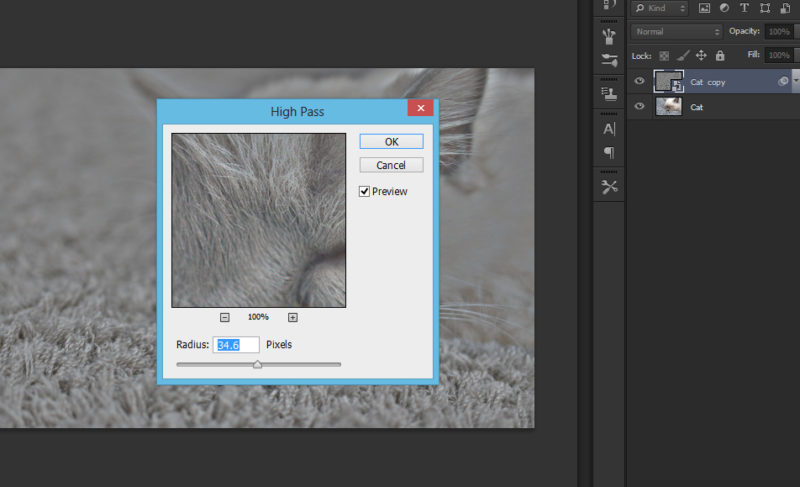
Now, on the duplicate layer run a high pass filter Filter > Other > High Pass. Drag the Radius slider until you start seeing the details.

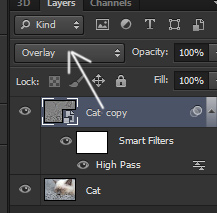
Finally, set the blend mode to Overlay.

And you are done!

Well, you should play around with the opacity slider to adjust the intensity of the effect and of course you can always mask out parts of the effect with a simple layer mask.
If you really want to fine tune this effect and bring out more detail you can run the high pass filter twice with different settings. Try doing one layer with a high pass set to a low number of pixels to bring out fine detail and another high pass layer set at a higher number to boost mid-tone contrast.
Access this tutorial, plus 143 more: Join Base Camp!
Access our entire library of Base Camp Photoshop tutorials for life!
Join Base Camp!Already a Base Camp or Summit Member? Log in to view this!


Loved the simplicity of this instruction!