Android Face Effects by Jason Hahn

This tutorial is a companion tutorial to Jason’s Girl Bot Tutorial. It goes a little deeper into the creation of the effects on the face. You can enjoy it as is, or watch it after checking out Girl Bot!
Jason Hahn is one of our featured artists, and this image won the Shift Art Photoshop Challenge in September, 2016!
In this tutorial, Jason shares how he uses the pen tool to make some very basic edits. Although basic, the effects have a huge impact on the overall look of the piece. This tutorial has both a video and a written tutorial.
Girl Bot:

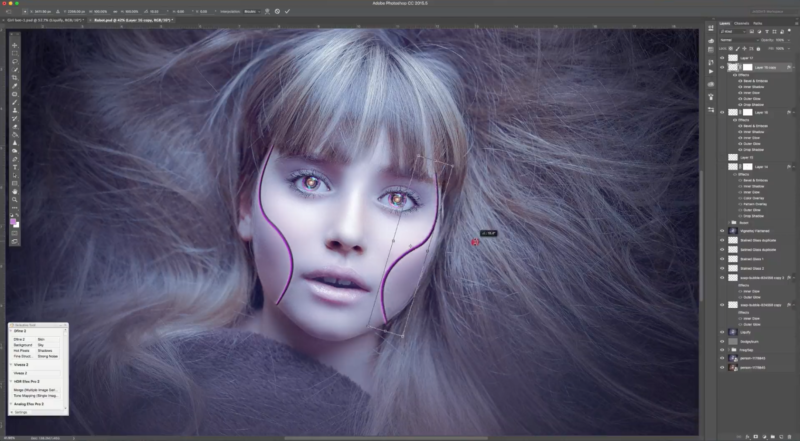
In this mini tutorial, I want to show you how I used the pen tool on my image of Girl Bot in Photoshop to create this separation on her face to give an A.I. cyborg look. The pen tool is one of the most essential tools in PS and can be the hardest to learn at the same time. This is as beginner as it gets for the pen tool, but if you are creating composites and photo manipulation art, you must at least know the basics. You will be able to get very precise selections and smooth lines and shapes that you can not get with any other tool. It will require many hours of practice and repetitive use to get the hang of it, but well worth it.
Video Tutorial:
Written Tutorial:
I started by adjusting the brush settings. I used a small hard brush at 100% opacity and selected the color I wanted to apply. Then I created a blank layer so this effect would be on it’s own layer. I selected the pen tool and then decided where I wanted to apply this effect to her face. I clicked once at the top of her face and clicked on another spot holding down and dragging to get the curve I wanted before letting go. Then clicking on another spot holding down again to create another curve in the opposite direction before letting go.
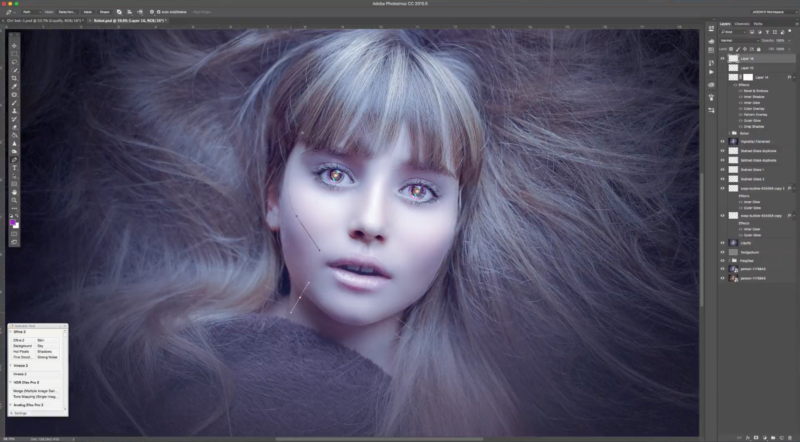
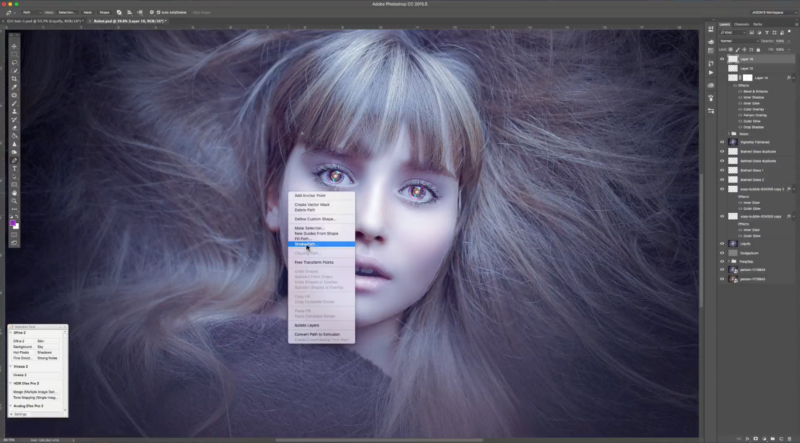
Once I had the basic line shape on her face with the pen tool, I hovered over the line and right clicked. This allowed me to select Stroke Path with the color of the brush and the settings of the brush I made earlier. Then to get rid of the pen tool line in the center of the stroked path, just click enter on a PC or return on a Mac.
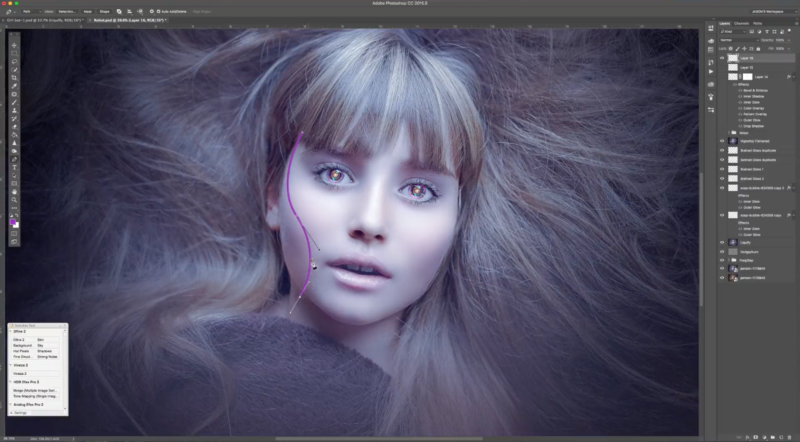
Here is the fun part! You can change the effect of this stroked path by going to the Layer Style panel by double clicking on the layer. I enjoyed experimenting with all the effects such as Bevel and emboss, inner and outer glow to create a realistic separation in her face ultimately giving a cyborg effect. I’ve seen this effect done many different ways but all have been done using the layers style effects panel.
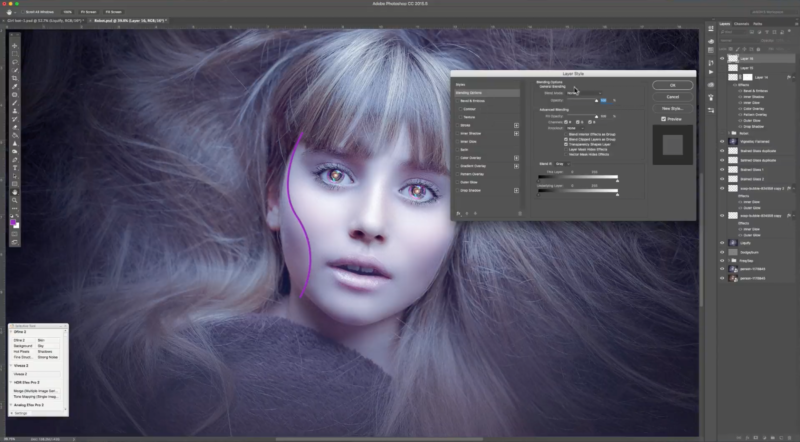
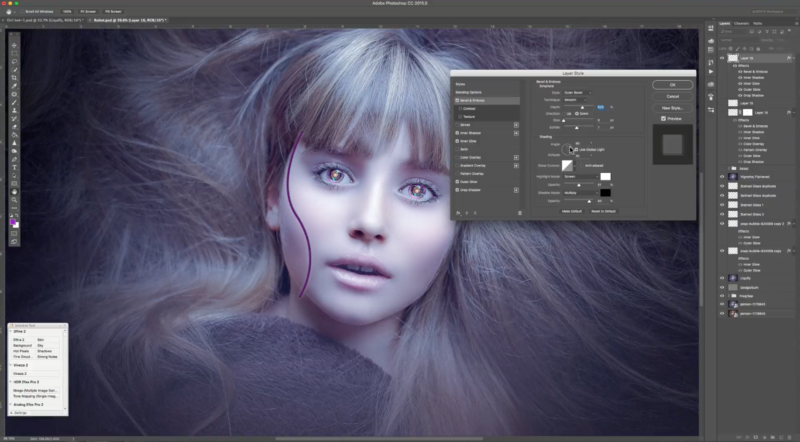
After achieving the effects I was happy with, then I wanted to adjust the shape of the line. I did this by going into the Transform tools and using Warp. This allowed me to stretch the line and move it around to give it more of a 3 dimensional look.
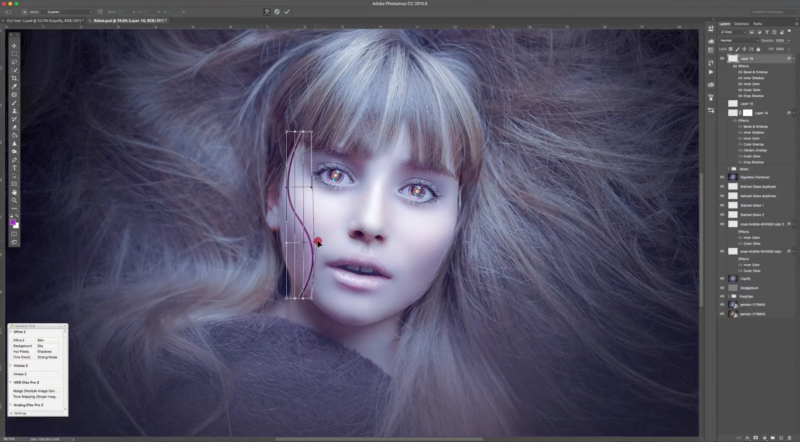
At this point, I’m done with the pen tool, the effects and placement of the line separation on her face, but I need to put it into a mask so I can make it look as if it is really part of her face. I masked out the bottom of the line up to where you can see just a small amount of her face. I masked out the top portion of the line to make it look like it was going under her hair by lowering the opacity to around 50% and slowly fading it out.
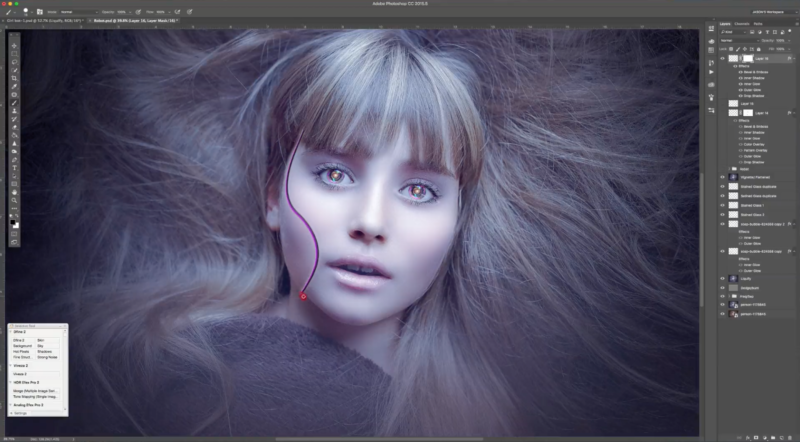
Then by selecting a darker portion of her skin color along her neck, I started painting between the line separation with a small soft brush at around 50% opacity also on a blank layer. This is where a little artistic skill can be helpful.
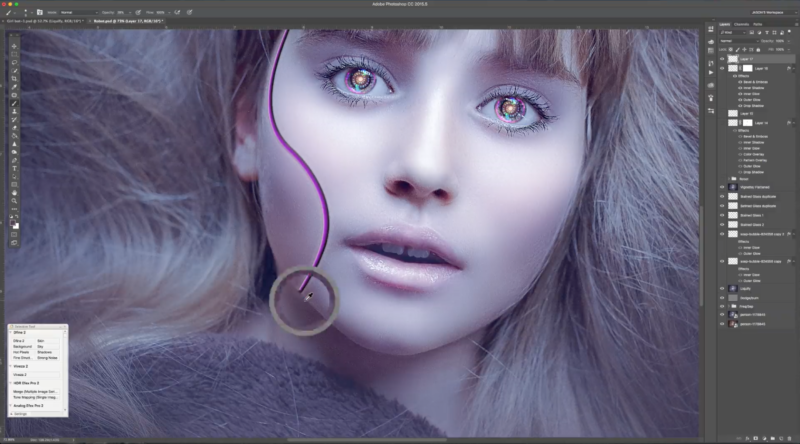
Once I finished the one side of her face with the cyborg line, I just duplicated that layer and flipped it over to apply it to the other side of her face. I made a few adjustments in the layer style panel for the global lighting and from there it was just experimenting with more lighting effects on new layers.
Access this tutorial, plus 143 more: Join Base Camp!
Access our entire library of Base Camp Photoshop tutorials for life!
Join Base Camp!Already a Base Camp or Summit Member? Log in to view this!


Nicely done tutorial. Always interested in seeing how these types of effects are done.
Thanks for sharing!