Extracting Models with Topaz Labs ReMask

Topaz ReMask has been replaced with Topaz Mask AI.
This tutorial will still help you understand the basics in the new version, but the interface and options may differ from the screenshots below.
We do NOT recommend Topaz Mask AI as it is not as good as Topaz ReMask, and definitely not as good as Photoshop Select and Mask!
We DO recommend using Photoshop Select and Mask for precise selections and extractions. Have a look at our Summit course, Master Extractions in Photoshop.
Read the full review of Topaz Mask AI at our sister site, Plugin Swirl.
In this tutorial Caroline Julia Moore shows how powerful Topaz ReMask is in extracting such difficult subjects as complex fly-away hair and semi-transparent fabric. Although there is a learning curve to master this plugin, it is well worth the effort. Watch and learn how all the tools of this plugin combine to create extraordinary selections!


Video tutorial by Caroline Julia Moore:
Ready to try Topaz ReMask yourself?
Save 15% on Topaz ReMask
Use coupon code SHIFTART during checkout to save 15%!
Use Code SHIFTART to save 15% on Topaz ReMask!
Written tutorial by Caroline Julia Moore:
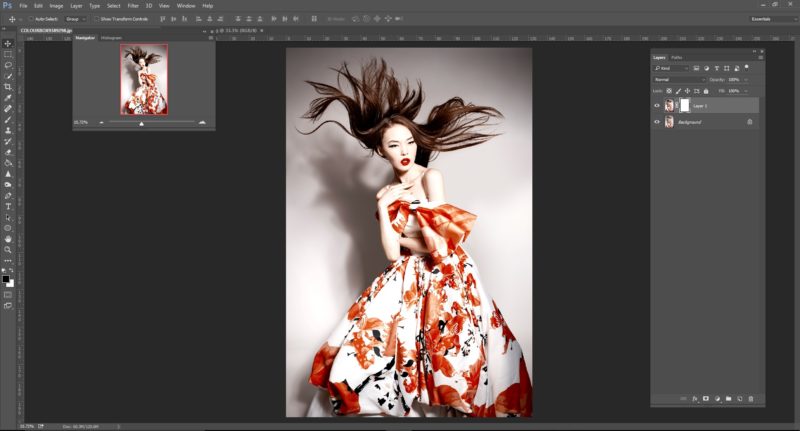
Topaz ReMask makes light work of extracting images; even images with high demands on extraction. I chose this image (from Colourbox) as an example because it is problematic in 2 main ways: the colour at the edges of the dress are very similar to the background; the hair is highly detailed and difficult to extract.

The latest version of Topaz Labs ReMask (5) can be run either as a stand-alone program or as a Photoshop Plug-In. For this tutorial, I am using the Plug-In since I want to take the image into Photoshop afterwards.
A really important thing to remember before you run the Plug-In, is to add a Layer Mask to the layer you are on before you open ReMask. If you do not do this, your saved layer after remasking will only be the extracted layer. Making a layer mask allows for your extraction work to be saved on the mask. This is really useful if you want to further refine the mask in Photoshop.
I usually prep images using a Levels Adjustment on a duplicated background layer. This accentuates the contrast between your image and the background, making life a little easier once you open ReMask. Since the work will be saved on a layer mask it is then easy to move the layer mask to your original (un-adjusted) layer.
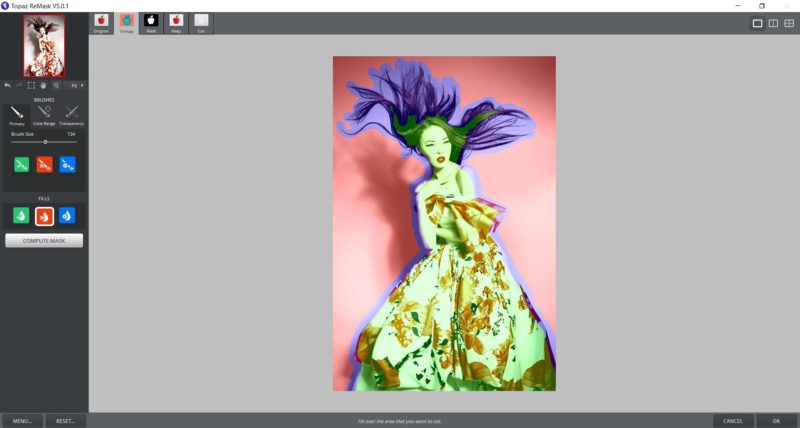
ReMask opens in Trimap View. This is where you select what you want the program to compute. The basic brushes in are Green (keep), Red (cut) and Blue (compute). The blue areas are where the program works the hardest, deciding what the boundaries for what is kept and what is removed are. When I first started using ReMask I mistakenly thought that the more precise you were in prepping the image with these brushes, the better job ReMask would do. This is, however, most often not the case as ReMask does an exceptional job of problem solving. The default on opening the program is that everything is filled in green (keep). Here I have traced around the model and her hair using the blue brush, containing the green within these boundaries. Next I use the red ‘Fill’ option to select the areas to remove.
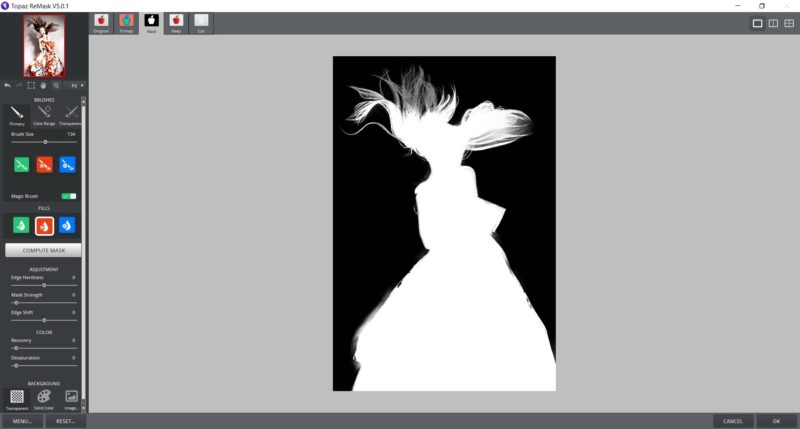
‘Compute Mask’ calculates the initial extraction and you can select various ways to view the results. You can see from the traditional, layer mask view, that ReMask has done a pretty good job.
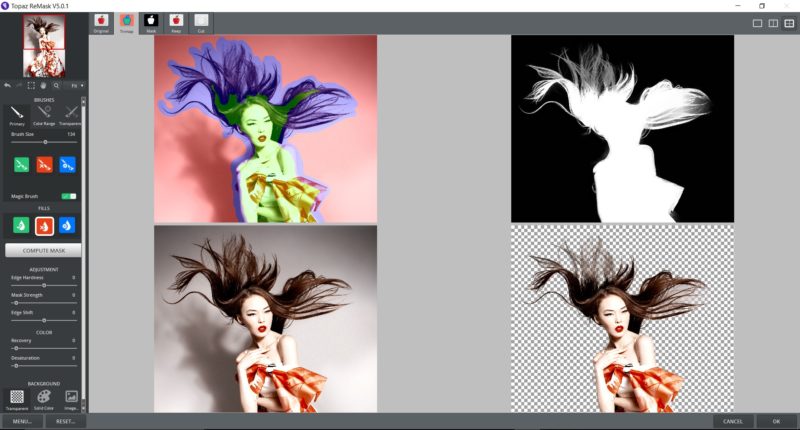
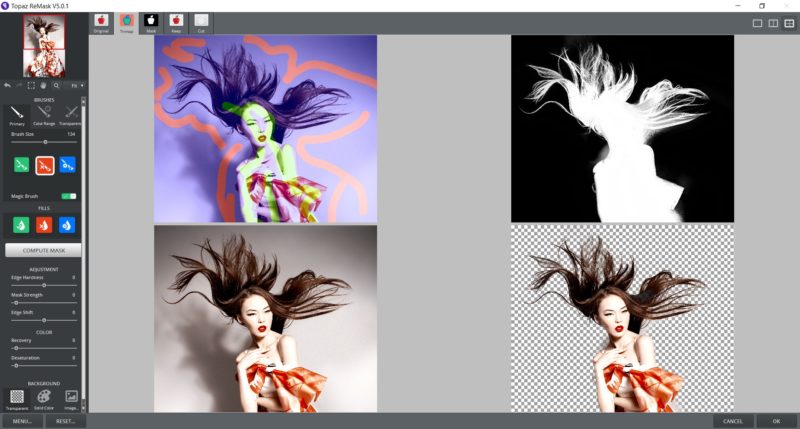
In the top right hand corner of the window there are options for viewing either a single image, side by side image (which you select your preferred view from the top of each of the 2 images), or 4 images. Screenshot 4 shows the Trimap, the Mask, the Original image and the extracted, Keep image. You can work within any of these views and indeed can switch between them.
There is a quicker selection method that actually works very well when you have difficult to define areas such as hair. I am going to use this method next. When you open ReMask, as mentioned above, the default is for the image to be filled in green. BUT it is actually better to fill the image in blue. This will extend the regions that ReMask has to compute but the program is extremely efficient. Make some broad lines and marks in green within the area you want to keep. Make a rough outline in red to show where regions are to be removed. You do not need to be precise.
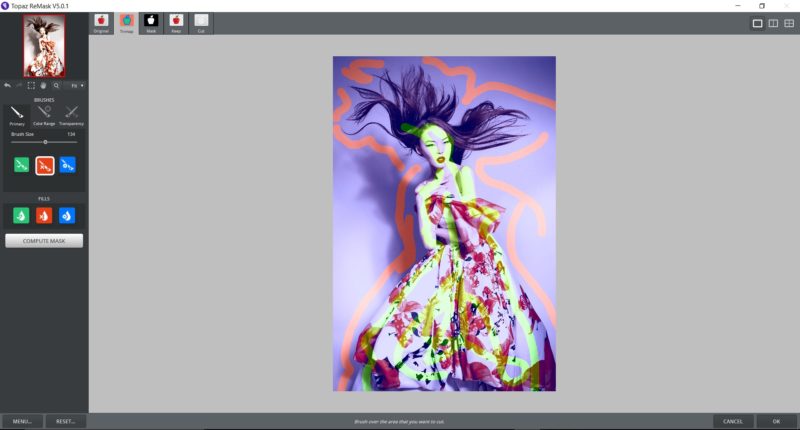
Screenshot 6 shows what a great job ReMask does using this minimal information. So really, there is no need to carefully trace around the edges of everything prior to hitting the Compute button.
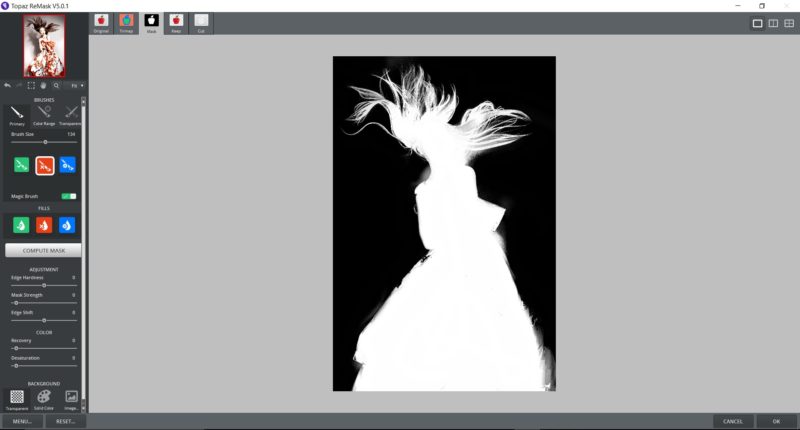
Here is a closer look at the result in the four view option.
When you are working on the extracted, ‘keep’ image it is usually easier to view it against a background. You can add a background of either solid colour (screenshot 8) or an imported image.
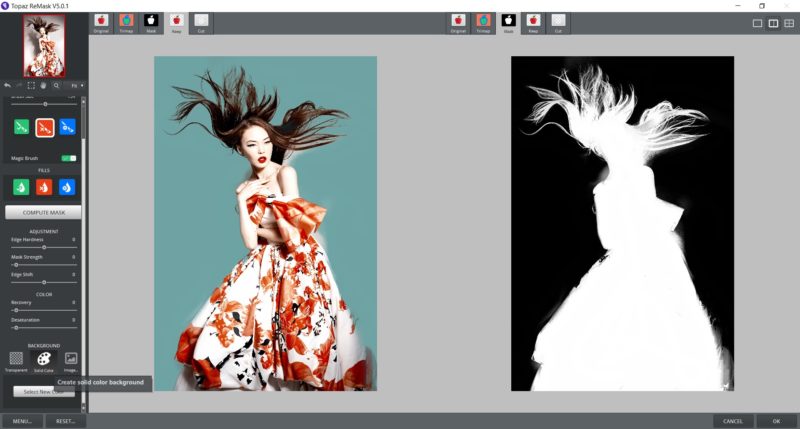
Under the Adjustments menu there is a Colour Recovery option which revives the colour of the foreground in transparent or weaker areas. It is always worth seeing the effect of boosting colour recovery.
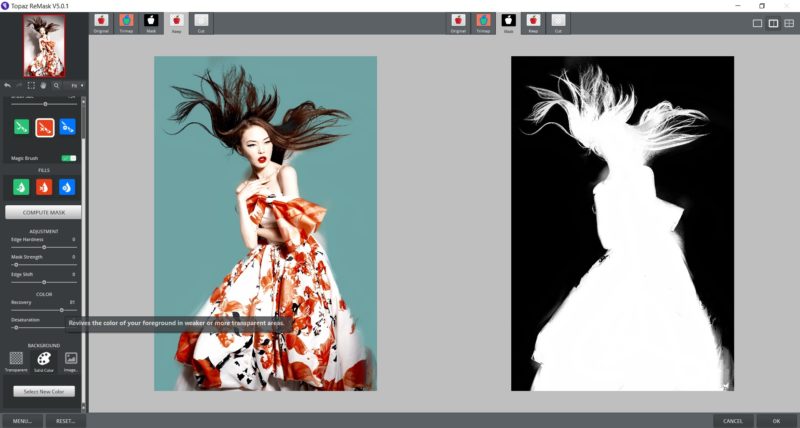
There are different options available to refine your extraction. I usually start by using the Magic Brushes. These will recover (green) or remove (red) selective areas of the image where you brush and will estimate how much to effect based on the compute stage (this only works in areas that were blue in the trimap). If you want to work in a region that is not blue, brush over in blue and recompute.
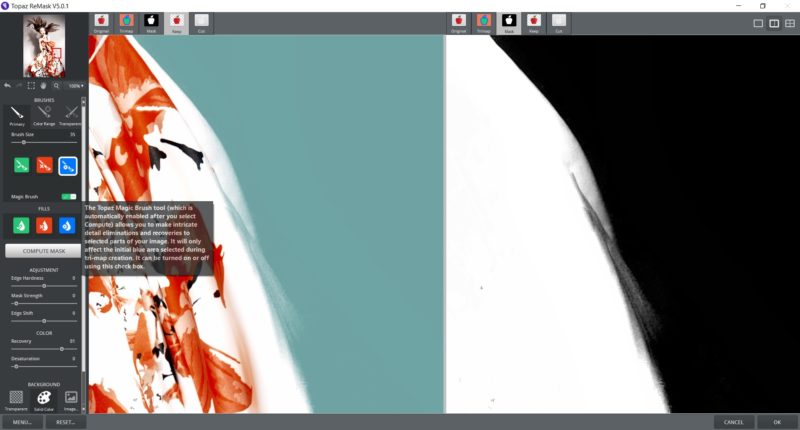
This is useful for going around the edges of the extraction and even works on regions where recover and remove are similar in colour. I generally work on the Mask view for this, as it is easier to define areas that are either black or white, painting over the more shaded regions to refine the extraction.
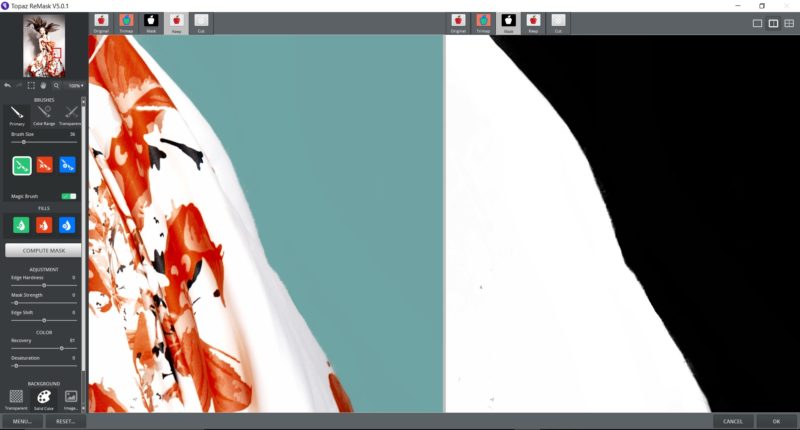
You can toggle the ‘Magic’ option to refine selections and use more like a standard brush.
Screenshot 12 shows the work to refine the extraction done so far. This has been achieved using the magic brushes. But a real strength of Topaz Labs ReMask is the power of the ‘Color Range’ brushes. This is an option that can be used when the colors of the ‘keep’ areas are different from the colors of the ‘remove’ areas. It is a tool that especially effective on hair, such as the area shown in the close up views below.
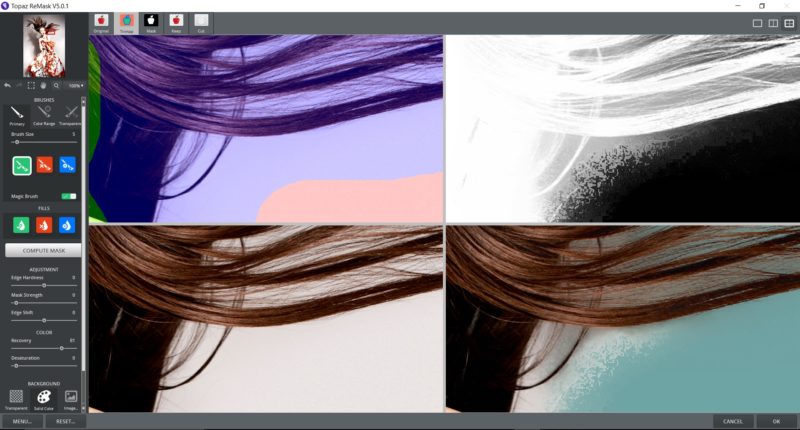
When you click on the Color Range option there are 2 adjustable sliders, brush size (which can be set to fairly large to cover an area with the same foreground and background) and color range. Color range determines the spectrum of shades from the color you select. This is really useful for selecting hair colors, since hair tends to be comprised of a range of similar shades.
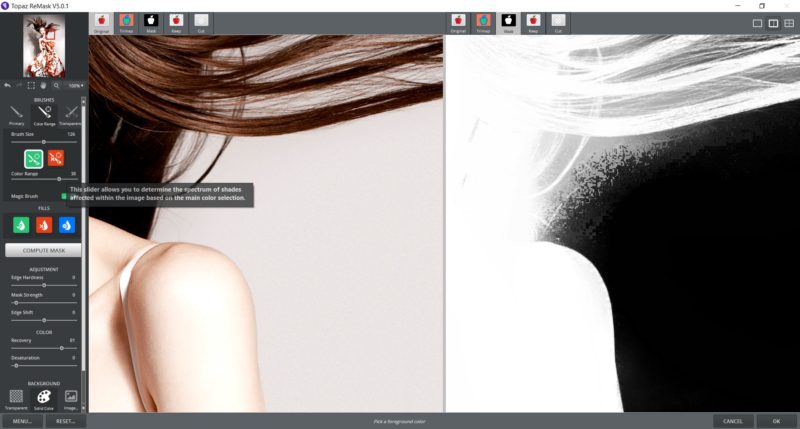
It is helpful when you are working with Color Range to sample the colours from the original image. Use the green eyedropper to select the colour to keep and the red eyedropper to select a color to remove. When you have selected a color you can then brush over the area and watch as it either develops or removes, depending on the option you are working on.
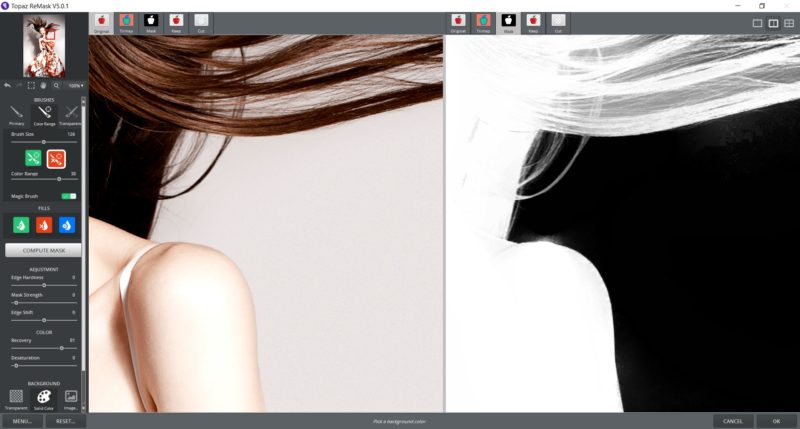
Keep working on areas, sampling colour as you go, prior to each brush stroke. You can see some of the results in close up, in 4 different views, below.
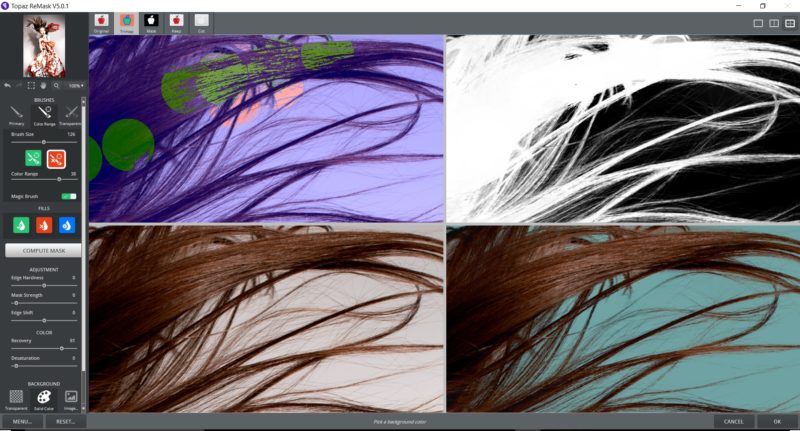
Here are the views of the finished extraction within ReMask, before I have pressed ‘Okay’ to save the extraction.
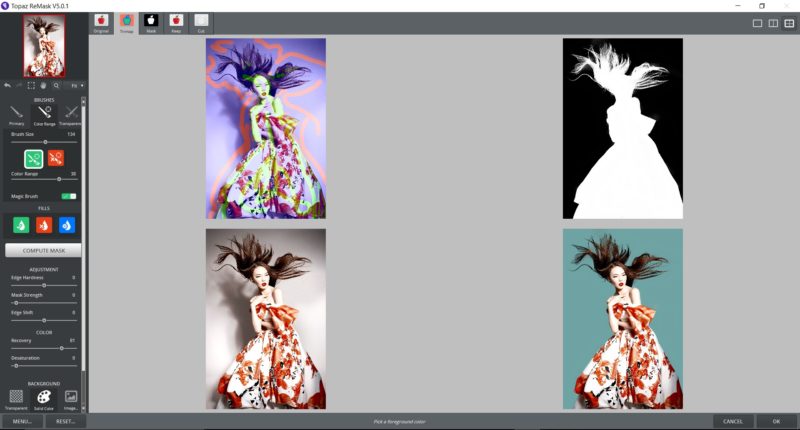
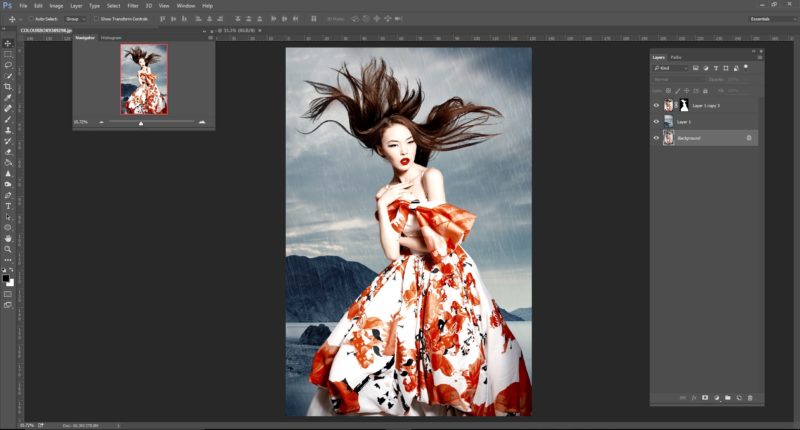
And this is the finished result in Photoshop, against a background. I duplicated the original background layer and moved the Mask created by Topaz using the Level Adjusted image to this layer.

Ready to try Topaz ReMask yourself?
Save 15% on Topaz ReMask
Use coupon code SHIFTART during checkout to save 15%!
Use Code SHIFTART to save 15% on Topaz ReMask!
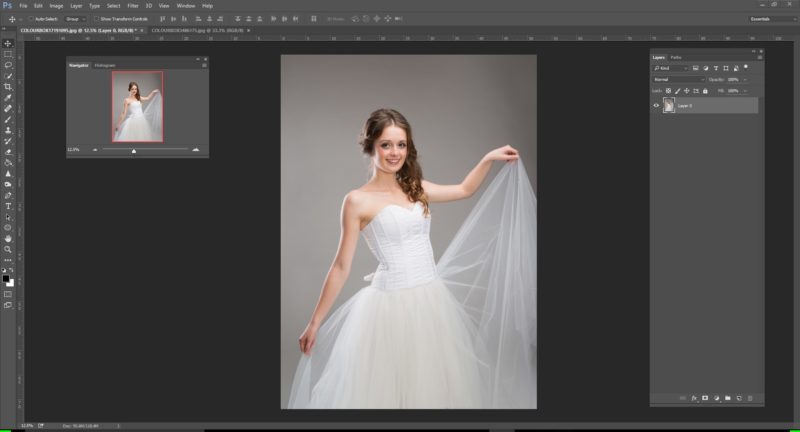
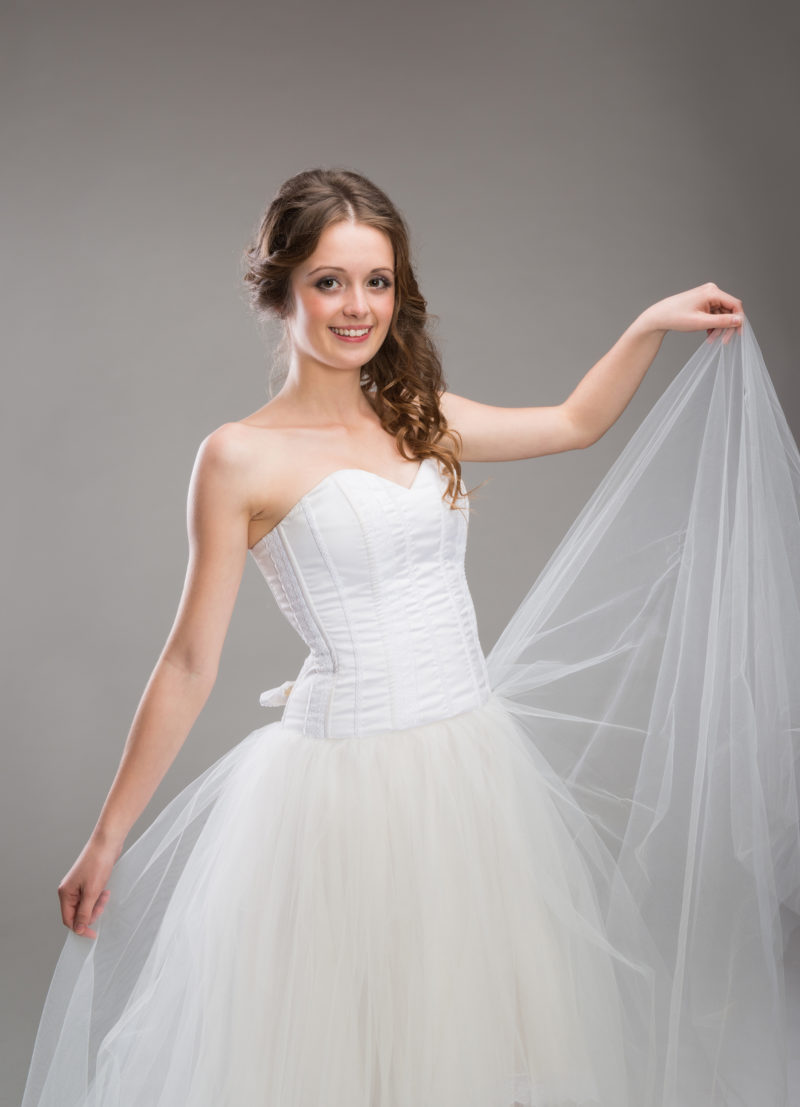
The next image shows a model wearing a veiled wedding dress. Topaz Labs ReMask is really effective at extracting even transparent material such as this.
Here is my Trimap selection:
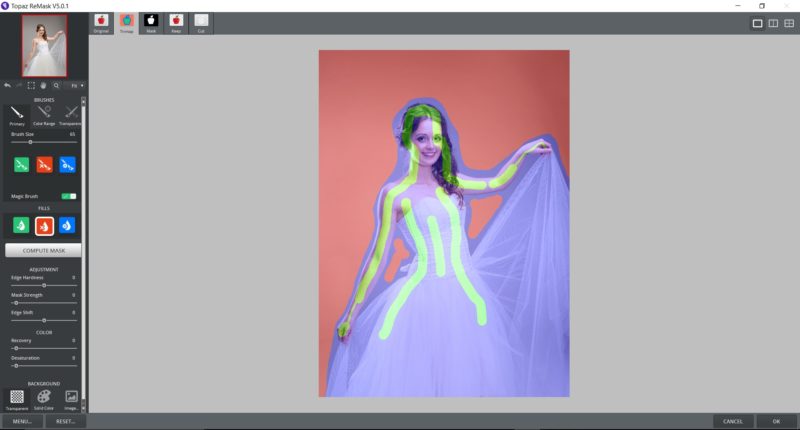
And the resulting Mask:
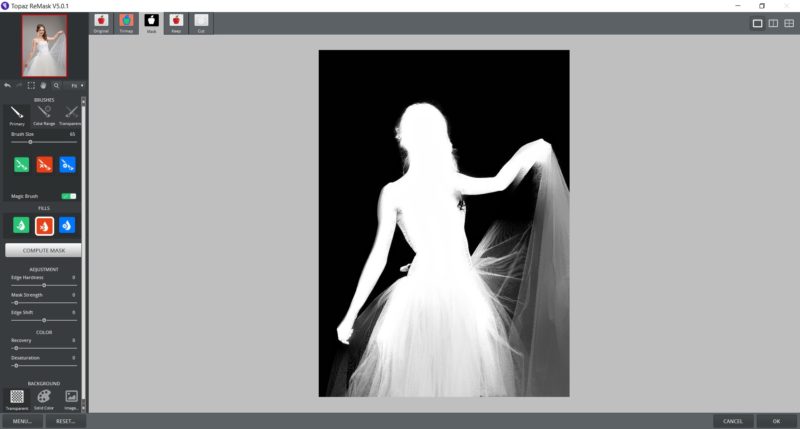
ReMask has actually computed a really good extraction of the image. But there are some areas of the veiled material that need refining.
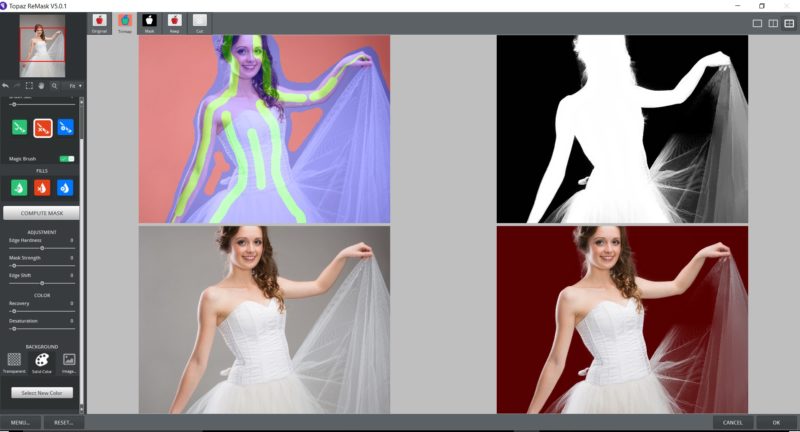
In the Brushes options select ‘Transparency’. It is best to work with the view of the original image and the mask image side by side. With the transparency option selected you are prompted to select both a Foreground and Background color using the eyedropper tool. Choose these from your original image.
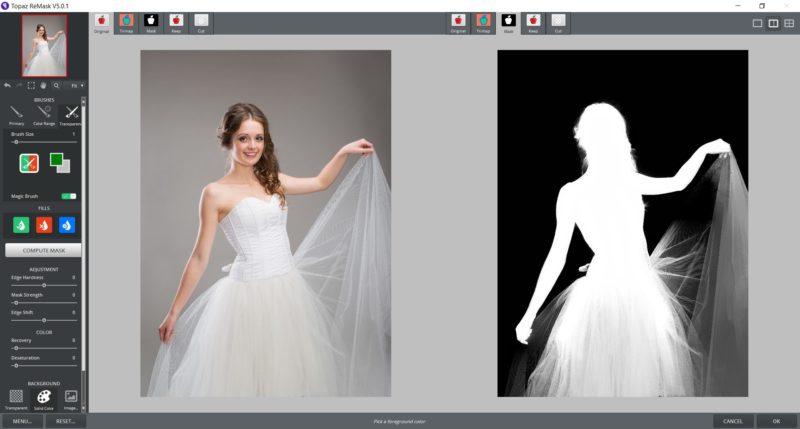
Then brush over the transparent area. It will look a bit odd until it has processed.
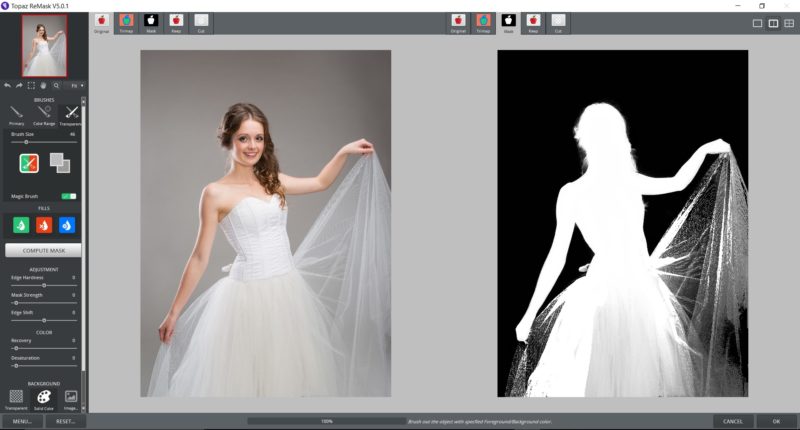
Screenshot 25 shows how well the program has worked.
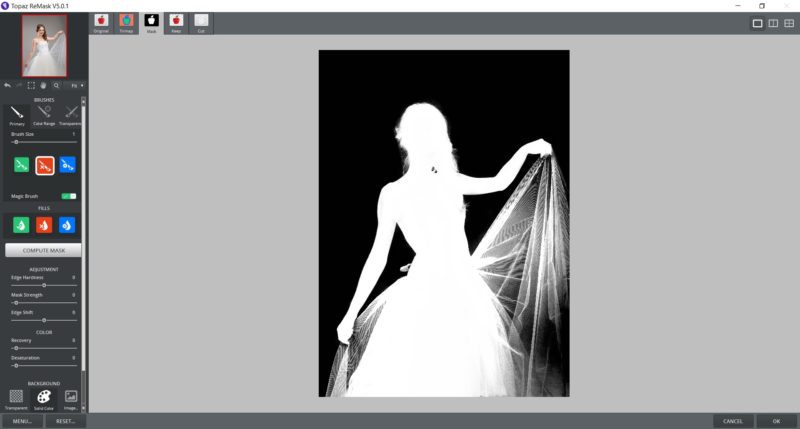
Screenshot 26 shows the image in Photoshop, against a background. You may notice that there is an area by the model’s right hand (on the left hand side of the image) that has not extracted perfectly.
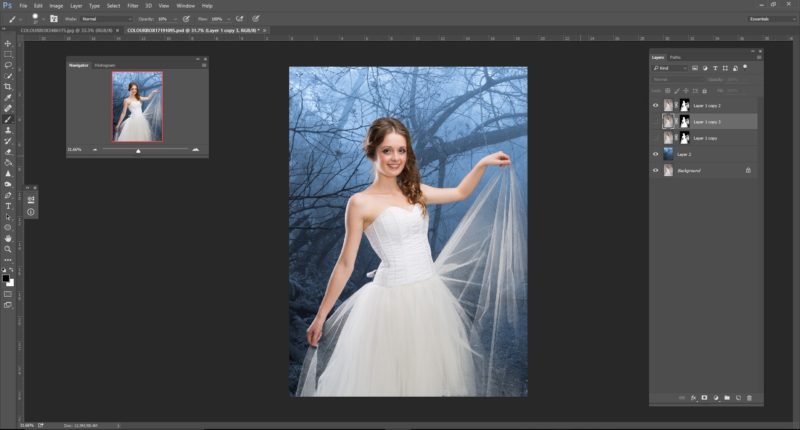
Since the ReMask extraction was saved onto a Layer mask it is easy to fix areas like this. It is a good idea to duplicate the layer and corresponding mask, so that your work is saved. Then, with a low opacity brush, adjust the mask.
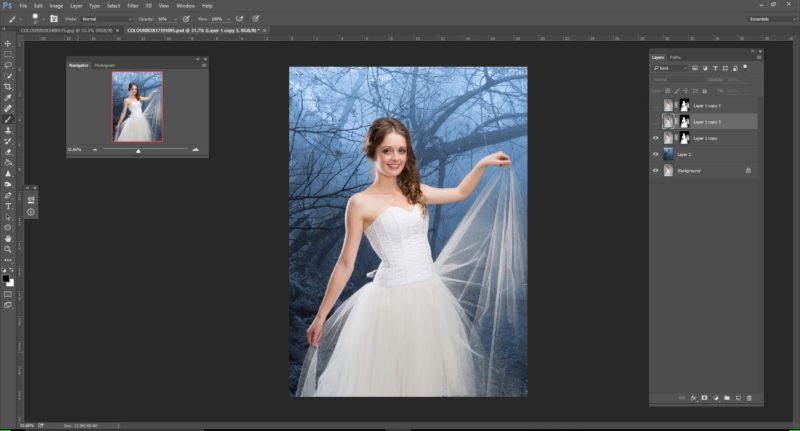
For this image I decided to increase the opacity of the veil material by duplicating the layer.
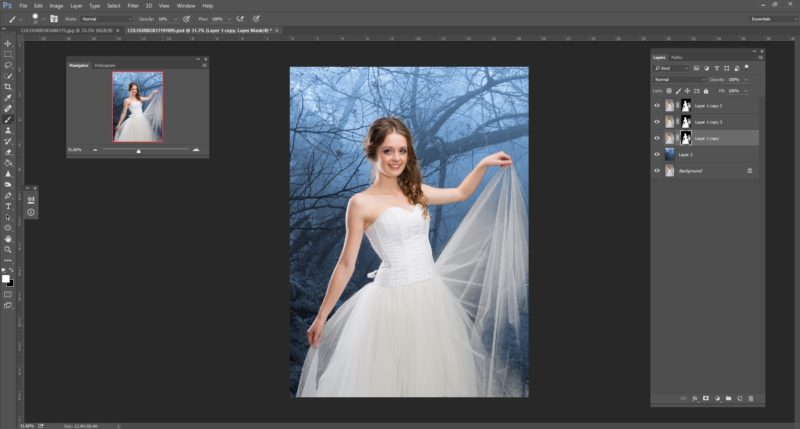
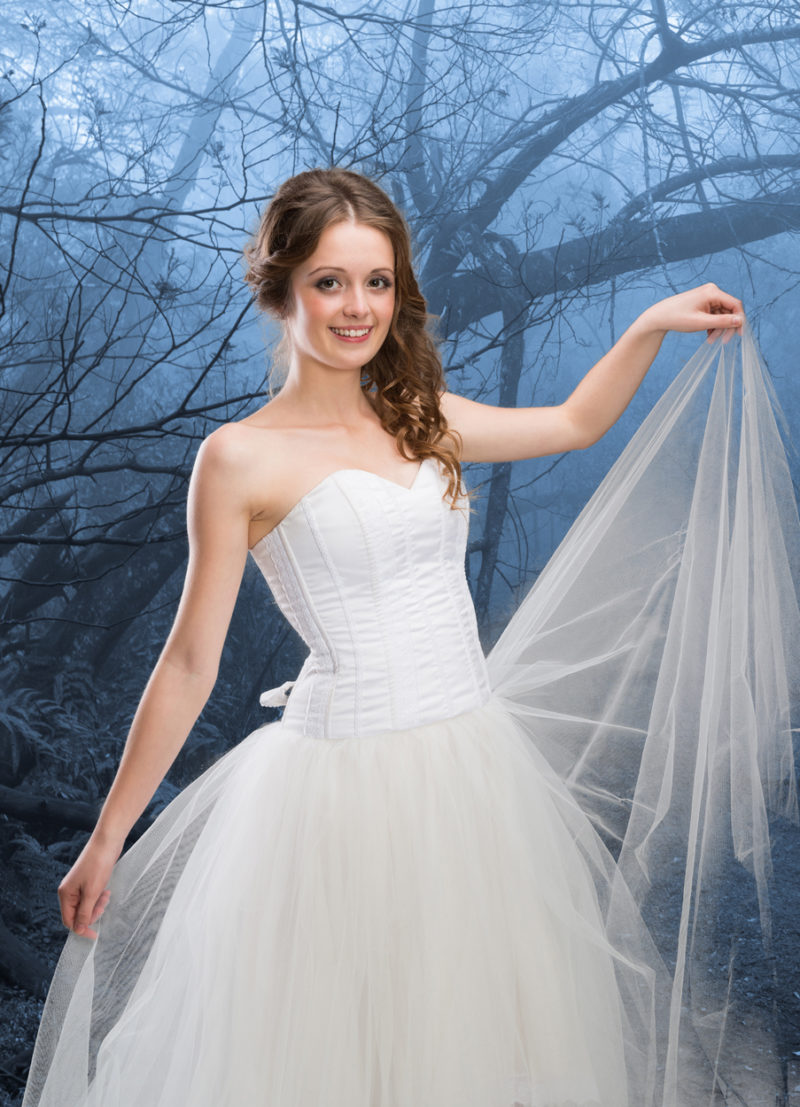
I am really impressed with the final image and I hope that you have learned about how to use Topaz ReMask. I use Topaz ReMask for the majority of my extractions.
Ready to try Topaz ReMask yourself?
Save 15% on Topaz ReMask
Use coupon code SHIFTART during checkout to save 15%!
Use Code SHIFTART to save 15% on Topaz ReMask!
Access this tutorial, plus 143 more: Join Base Camp!
Access our entire library of Base Camp Photoshop tutorials for life!
Join Base Camp!Already a Base Camp or Summit Member? Log in to view this!


Fantastic tutorial! Thank you ShiftArt and Caroline Julia Moore.
So glad you liked it 🙂
Thank you Carolyn Julia Moore for this excellent tutorial. I have had Remask for quite some time and finally I understand how to use it with your easy to understand demonstration.
What a great reaction. I am so pleased
How cool is that! Thank you for such a detailed tutorial!
Su
Thank you Su. Hope it was useful.
Thank you Caroline for a wonderful tutorial. I like Lonnie above have also had Topaz 5 for some time and you have now open my eyes to understanding how to use it so much better.
Kind regards
Debra
You are very welcome. So pleased as the Topaz Remask is very powerful… I love using it.
thanks for the great tutorial, I have Remask but have not used it much, will now give it another try!
So glad 🙂
Thanks Caroline – I use remask extensively, but I’d never worked out why sometimes I get an extraction and sometimes a layer mask when returning to PS – you solved that mystery for me! I’m stoked!
Judi
This is a great tutorial but I came unstuck towards the end of the first section. I used the plugin with Elements. When I had completed the “keep” image I clicked on OK to return to PSE and could see the image with the mask in the layers panel. However, when I tried to duplicate the original background layer and move the Mask created by Topaz using the Level Adjusted image to this layer nothing happened. When I added a background paper above the original background image so that it was below the Remasked layer I could then see my extracted image on the new background. Where did I go wrong?
If I wanted to make further adjustments to the mask how would I do that?
Thanks for your help.
Sorry for the late reply.
I am not sure what may have happened in PSE. However, if I understand the issue correctly make sure that when you duplicate the background layer and apply the mask that you have the original background layer turned off. Otherwise you would just reveal that with your mask.
If you want to make further adjustments in Topaz, you would have to save the mask inside Topaz before applying it to your Photoshop layer. This way you can bring it up as many times as you want.
A really interesting tutorial. I downloaded the 30 day trial to try it out first. I’m obviously just starting to learn what it can do but it seems to me that if you use it where your original model is on a plain backdrop then it probably works well but where the model is on a busy background, it doesn’t seem to be working any better than select and mask. I shall keep trying it out but glad I haven’t paid for it so far. I need to search out some more tutorials.
So many thanks for this tutorial. Very helpful and well explained.
Very helpful. Thank you. I have used Topaz plugins in the past, and clearly, I will have to add Remask to the kit! Cheers.
Thank you very much.
I tried the 15% discount code and it says that it doesn’t exist when I try to purchase remask.
Melanie, I apologize for the mix-up. Topaz Labs just switched to a whole new shopping cart system which made my coupons invalid. I will be receiving new codes this week and will update them as soon as possible.
Fantastic tutorial Caroline, this convinced me to try out Topaz Remask, till now I have relied on select and mask in PS, which works quite well, but it looks to me as if Remask is working a bit faster and also easier with better results; thank you also for the written tutorial