How to Dodge and Burn Using Blend If

Have you used Blend If when editing your images? Chances are you have not come across it but once you see how it works you will, no doubt, be using it a lot.
Before and after:
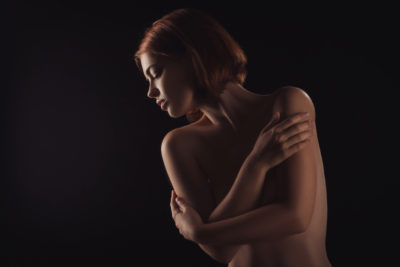

In this short tutorial, we are going to use Blend if to enhance highlights and shadows in the image below, which is from Pixabay. You can download it yourself here: Download model image.
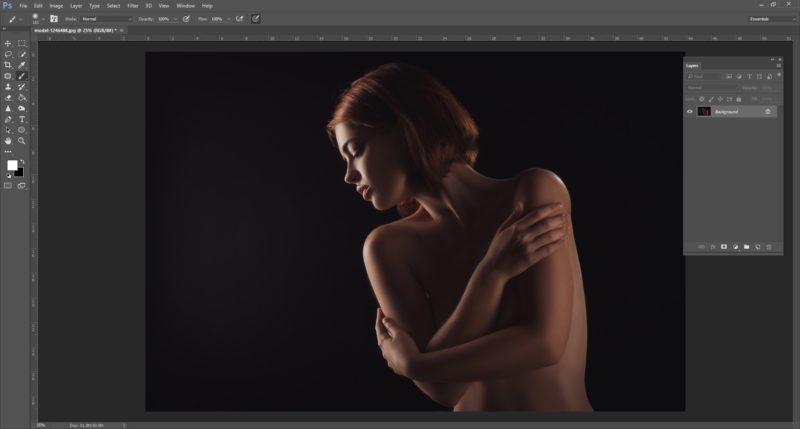
Let’s start with the highlights. Add a new, blank layer and with a soft, white brush (set to Normal Blend Mode at 100% so you can see where you are painting) roughly paint over areas that are highlights. Don’t worry about being accurate.
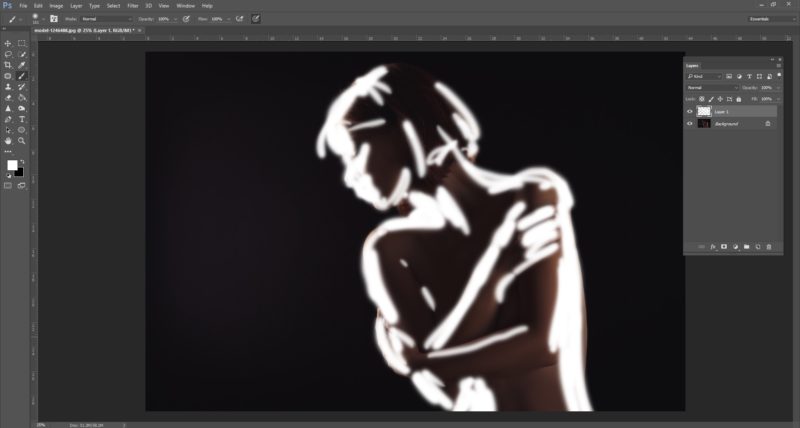
Next, set the Blend Mode of that layer to Soft Light.
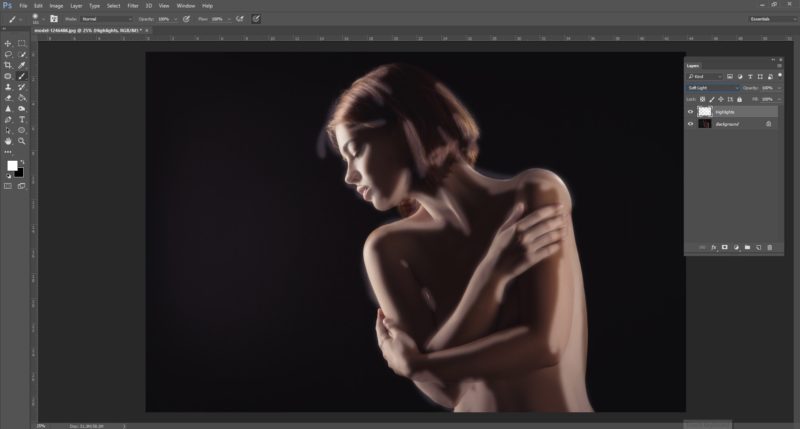
Open the Layer Style Menu. The quickest way to do this is to double click on the layer you are on. Blend If works by telling Photoshop how to blend one layer to another. Since we want the highlights to only appear in areas where there are existing lighter regions we want to get Photoshop to blend the painted layer to the original background layer in these light areas only.
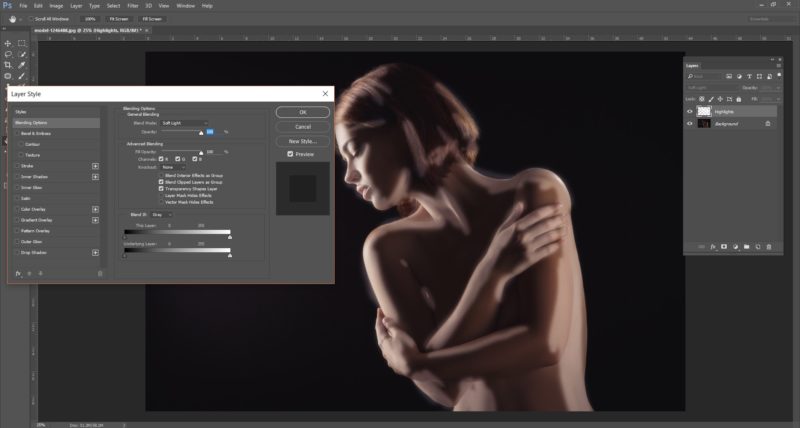
The top slider relates to the layer you are on. This does not need to be altered. The bottom slider relates to the layer below. By dragging the pointer away from the dark end of the slider we are essentially telling Photoshop to not reveal the layer above (with the white paint) in dark areas.
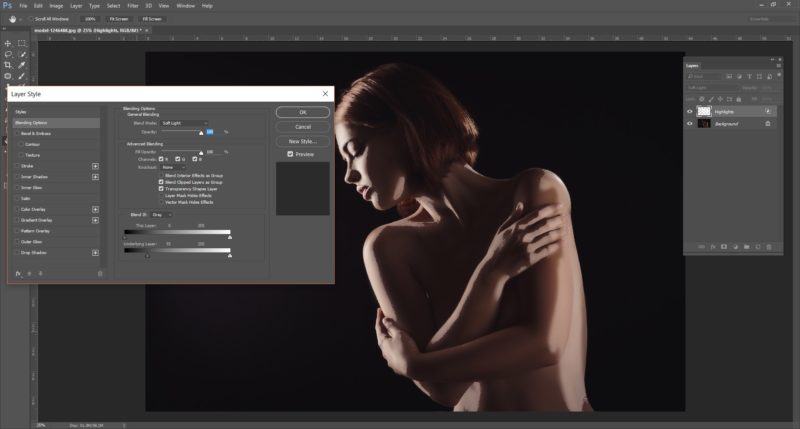
The light areas, however, look very separated and rough. To give the selection a more gradual transition click on the pointer you are moving with the Alt/Command key pressed down. The pointer will split in two and you can move them independently to optimize the blending.
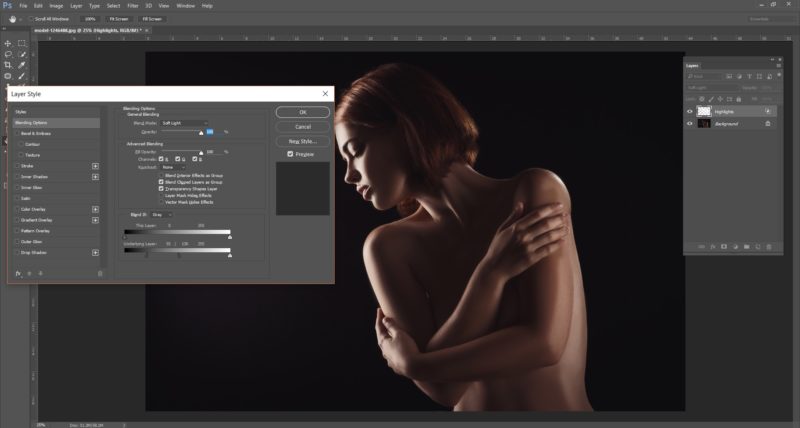
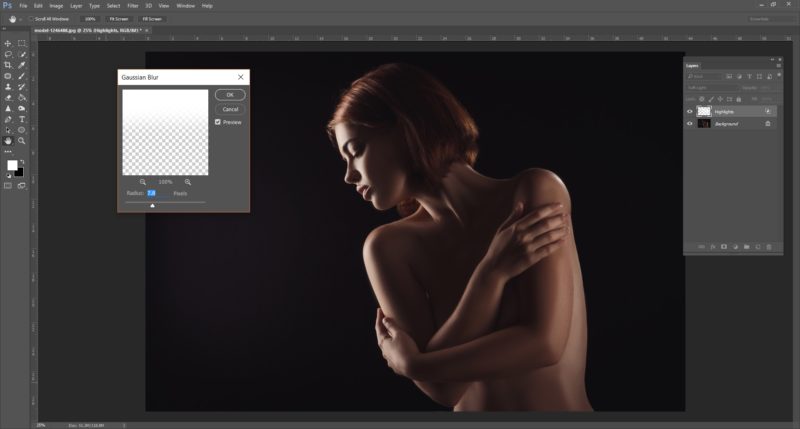
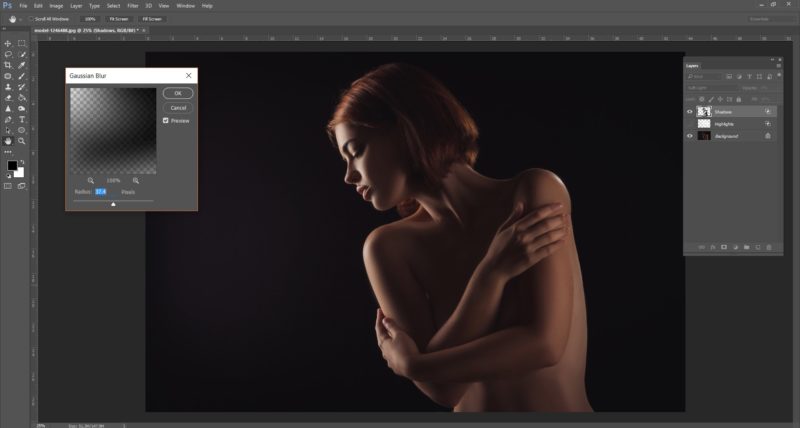
After clicking ‘Okay’ you can then adjust the opacity. I have also added a Gaussian Blur filter to soften the effect.
Toggle off the highlight layer and add a new blank layer. This time use a black brush and paint over shadows.
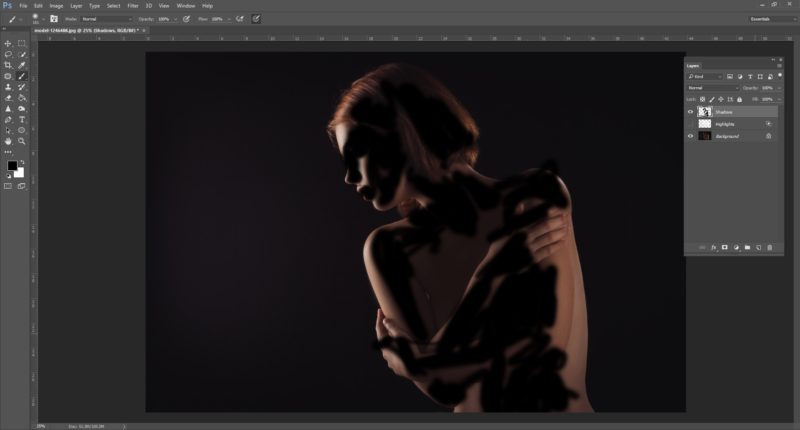
Set this to Soft Light Blend mode (you don’t have to use soft light but this usually works best for highlights and shadows).
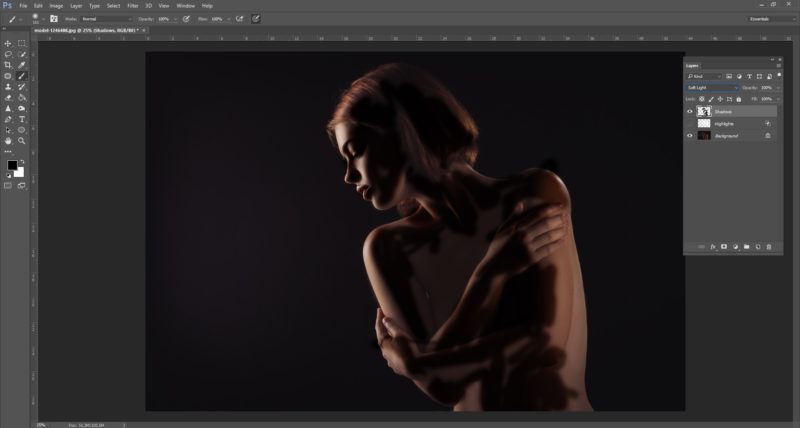
Double click the layer to open Blend If. This time you are going to tell Photoshop to only blend in dark areas, so move the pointer away from the white area on the right of the slider.
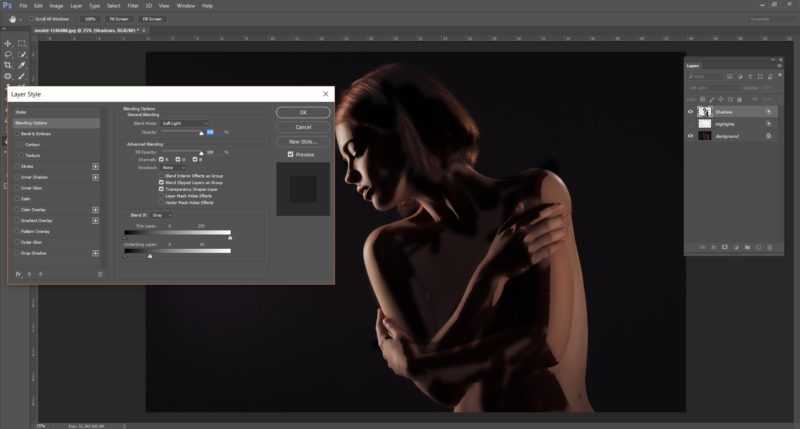
Remember that you can split the pointer using Alt/Command.
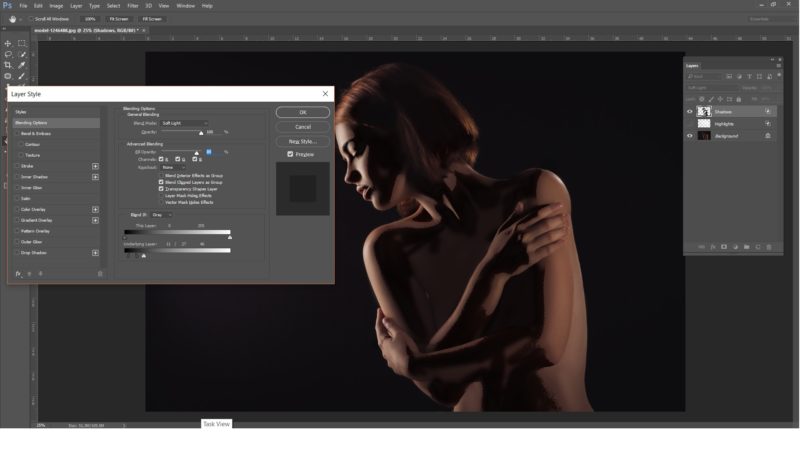
You will probably have to lower the opacity of this layer a lot.
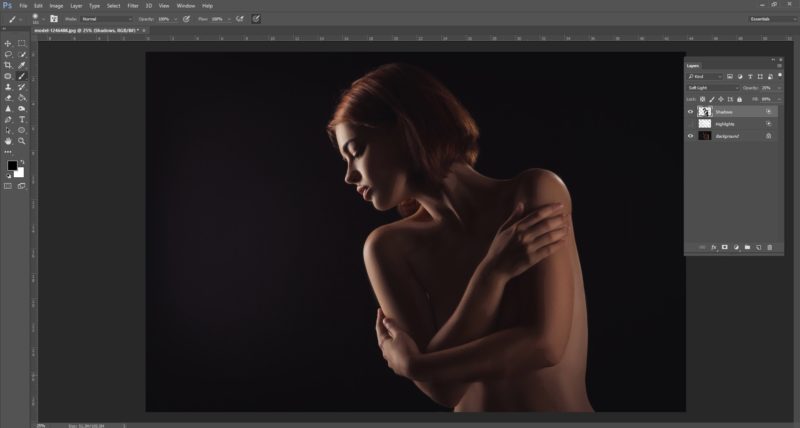
Indeed, I lowered the opacity even more, to less than 10%.
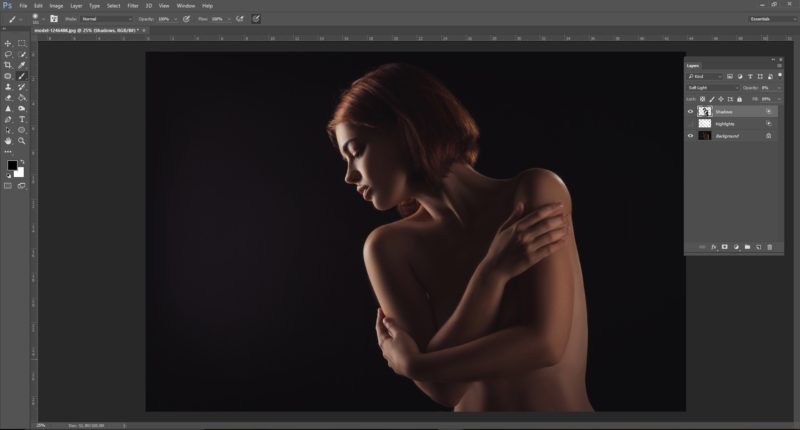
You can also apply a Gaussian Blur to the layer.
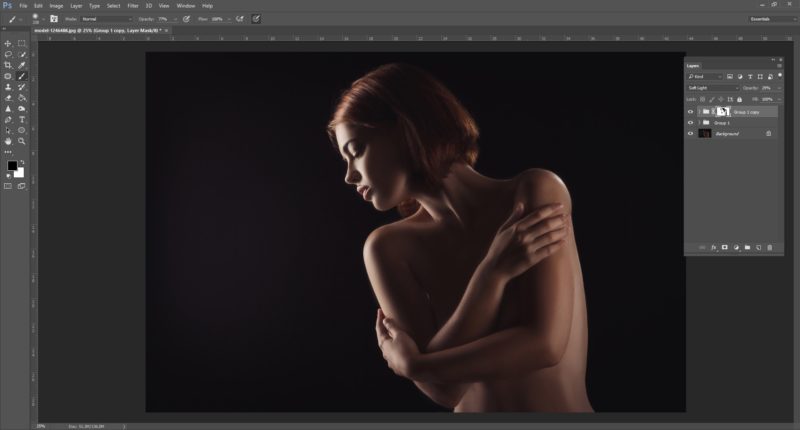
So, we have basically applied Dodge and Burn to the image. You may want to put these layers into a folder and push the effect further. I duplicated the folder at a lower opacity and added a Layer Mask, to accentuate the effect in some regions.
Now we have learnt a little about how Blend If works it is easier to see how it can be useful in many scenarios. For example, what if you want to add a subtle color, but only to areas that are highlighted. To do this add a new layer and blend the previous visible layers onto it (Ctrl+Alt+Shift+E). Add another new layer and fill it with a color (I sampled a region of the model’s hair to use as a color palette).
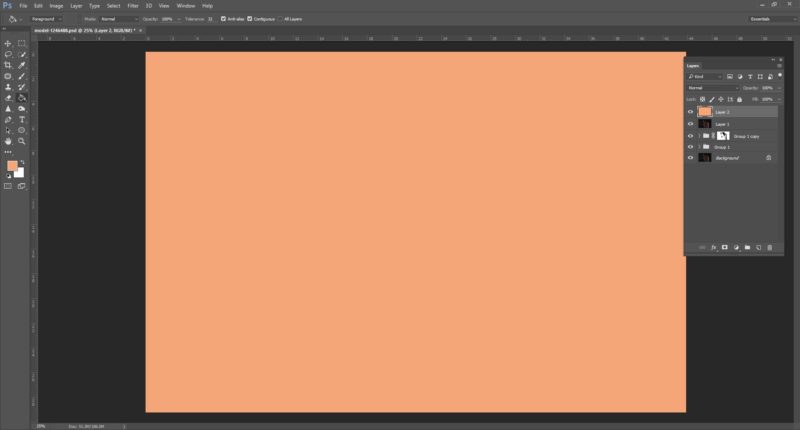
Use Blend If to apply to the light areas of the image.
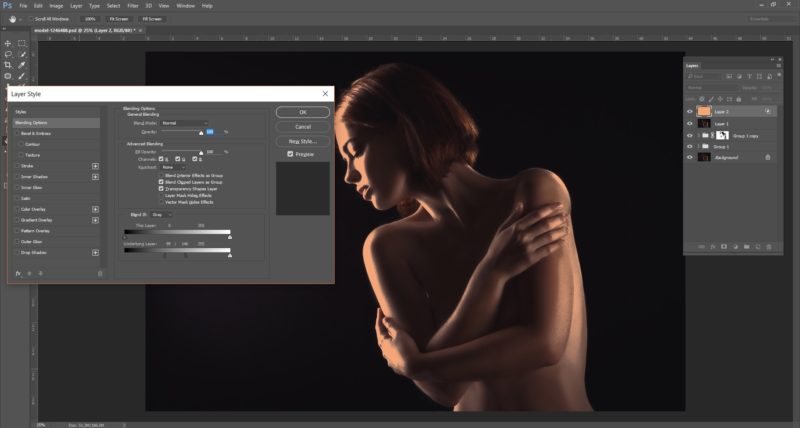
Try different Blend Modes and Opacities. I used Overlay Blend at 70%.
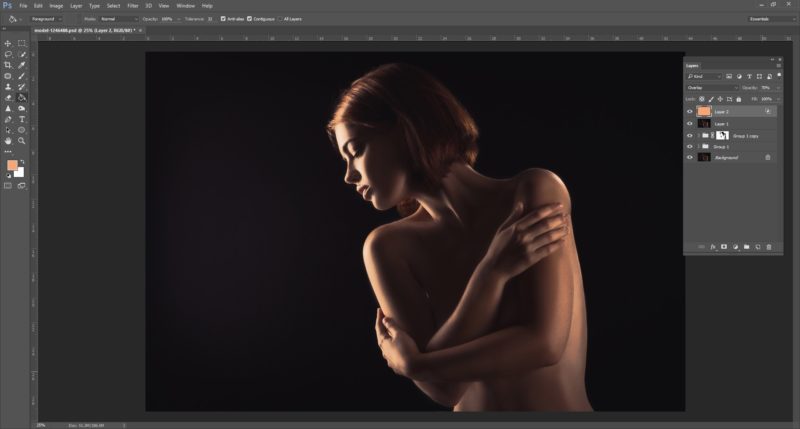
There are so many ways that you can use Blend If in your images. It always amazes me just how powerful Photoshop is, and how many ways you can use the tools it contains.
Access this tutorial, plus 143 more: Join Base Camp!
Access our entire library of Base Camp Photoshop tutorials for life!
Join Base Camp!Already a Base Camp or Summit Member? Log in to view this!


This is fantastic. I always used the 50% gray method, but this one gives more sophistication. Thanks for the meson.
Great! I will try this on my next work.
Thanks easy to follow and a great lesson
Great to know! Will try this on my next piece! Thanks!!!
Thank you for this way to use blend if. It works perfect.
Thank you
Wow! a great way to do dodge & burn. Thanks
Thank you! This produced a beautiful result! I followed using the Pixabay model, but I had trouble when picking the colour from the model’s hair. I couldn’t fill the new blank layer, so I used Color Picker Foreground Layer and chose a peachy colour, which worked pretty well, but I’d have loved to do it as in the tutorial. It would be useful for other images of course. If anyone can let me know I’d be very grateful!
nice thank you
I had a problem trying to open this image – photoshop told me it was the wrong type?
Hi Della,
I think could be a problem with the image type. You can open it in different program like Window Painter and then save the image as jpg from there. Then open it in Photoshop and it should work.
Thanks,
Bunty