How to Turn Day Into Night

In the tutorial All Hallows Eve a day time scene was transformed into a night scene using Color Range and various blending and blur effects. Color Range is a useful option for altering the tone of an image in selected regions that share a similar range of colors.
Before & After:
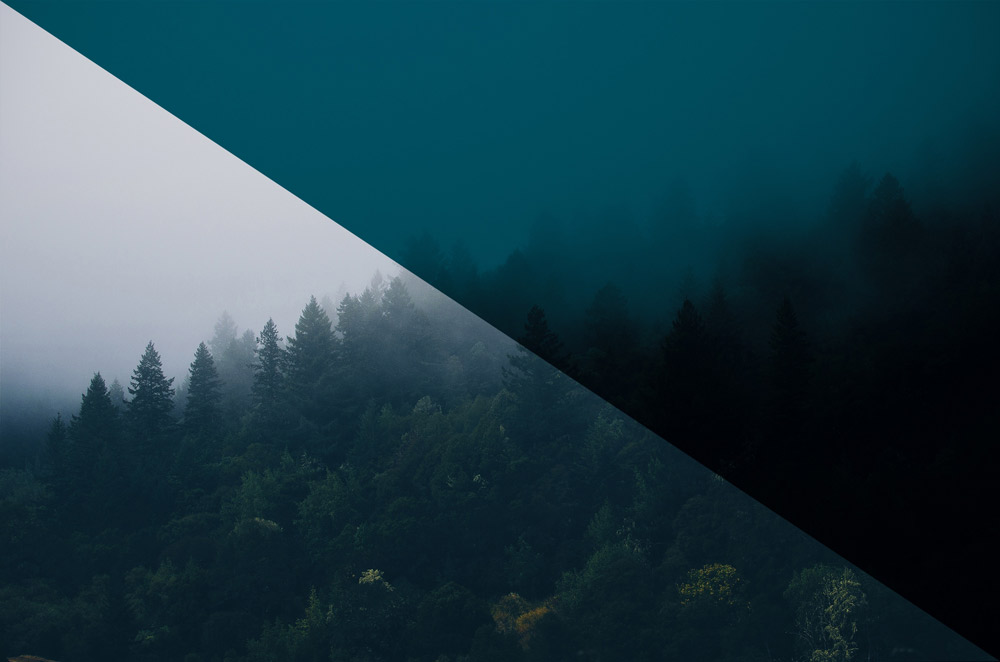
In this mini tutorial, I am going to show you how to change the colour of a sky using Color Range.
Let’s look at the image below. You can download this image yourself here: Forest Image
Duplicate your background layer and then click on the Color Range option, which is under Select > Color Range.
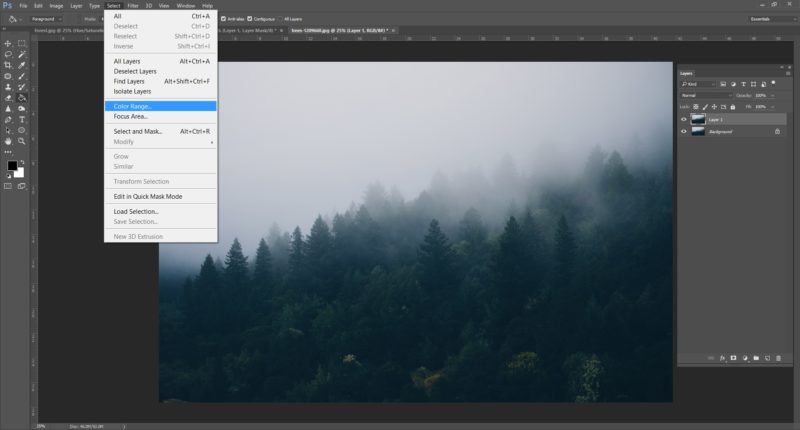
Color Range works by selecting pixels that share the same color as an area that you define. So, in this case, we will select the whiter regions.
Select the Sample Color Option, which gives you full control over defining the range of your selection. There are 3 eyedropper tool option: initial selection, add to the selection and subtract from the selection. Start with the Initial Selection eyedropper and click on a part of the image that has the color range you want to select.
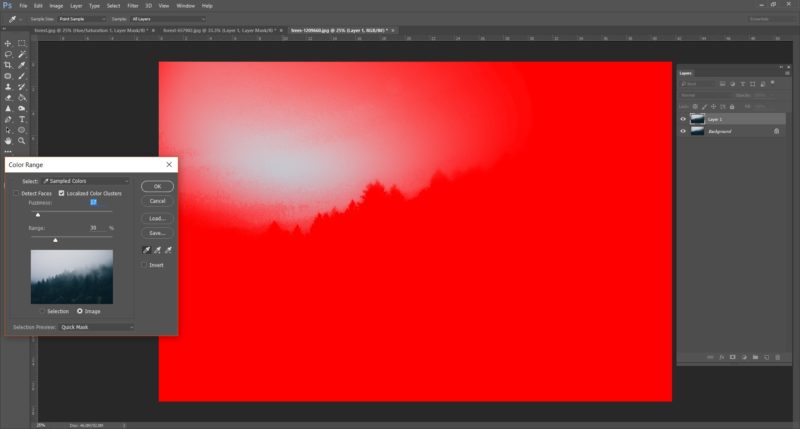
Photoshop selects all the pixels in the image that are the same color as this initial point, as well as the pixels that are like that color (based on luminosity, ie whether they are lighter or darker). You can adjust the parameters using the ‘Fuzziness’ value: the higher the value the more pixels included.
By selecting ‘Localized Color Clusters’ you can determine the range of color included from the point of your selection. Since we are looking across the whole image I have not selected this.
Use the Add To Selection eyedropper and keep selecting and adjusting Fuzziness values. Use the Subtract From Selection eyedropper to remove details if you need to. You might like to try selecting Localized Color Clusters and altering the Range values.
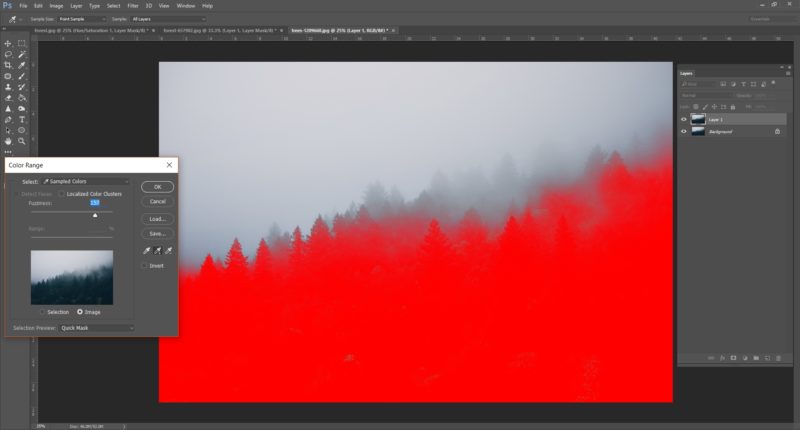
When you press Okay, you will see that there are ‘marching ants’ around the color range you have defined. Don’t worry if the selection looks strange; the marching ants are not always an accurate representation.
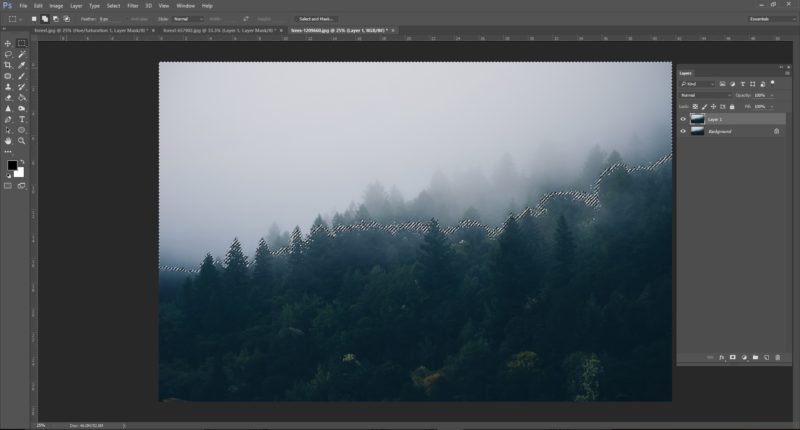
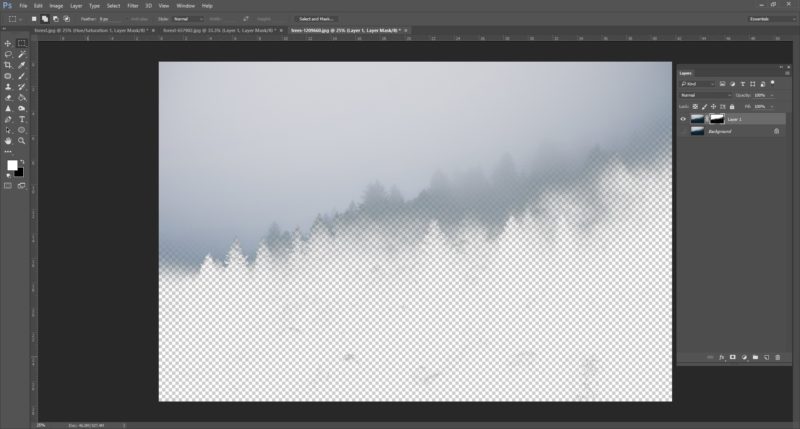
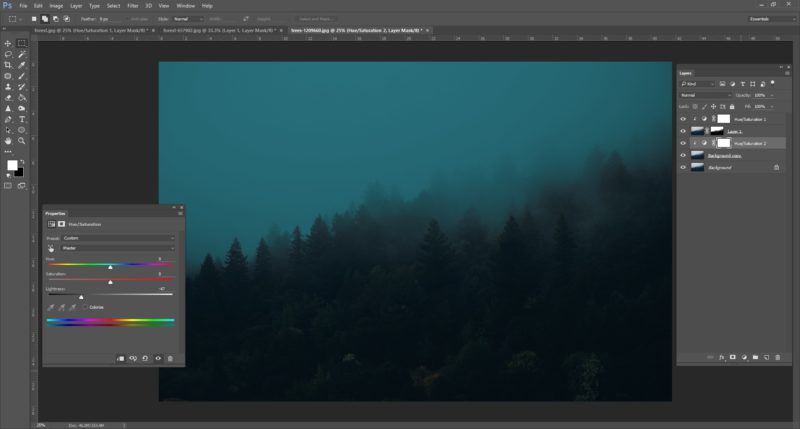
Add this selection to a Layer Mask. If you toggle off your original, background layer you will see the isolated sky areas.
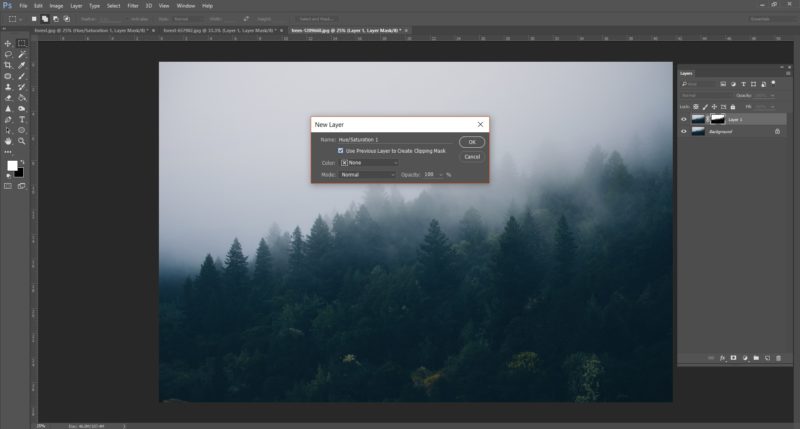
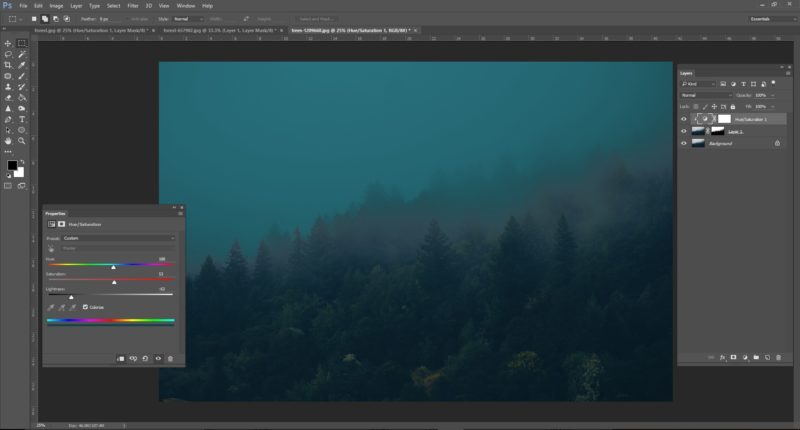
Add a Hue/Saturation Adjustment Layer and clip it to your Color Range layer (so that the adjustments only effect the areas in the mask).
Get the Full Tutorial!
This technique is one of many covered in the tutorial All Hallows Eve, by Caroline Julia Moore.
Next, make a duplicate of the Background Layer and clip a Hue/Saturation Adjustment Layer to it until you are happy that the effects are blended well.
Add a new layer and merge all previous visible layers onto it with CTRL+ALT+Shift+E and apply a Camera RAW Filter (from the Filter Menu), adjusting the options until you are happy with the result.
Access this tutorial, plus 143 more: Join Base Camp!
Access our entire library of Base Camp Photoshop tutorials for life!
Join Base Camp!Already a Base Camp or Summit Member? Log in to view this!


Merci !