Best rendering settings for your hardware!
 Rendering… Where do you start?
There is no quick and easy answer to this question. And there is no answer that will fit all hardware combinations out there.
There is no ultimate formula to determine your best settings.
Finding the best rendering setting for your specific hardware is a trial and error process. The combination of factors determine render quality.
But that doesn’t mean we can’t find great settings for our setup!
Here are some things to consider as you start experimenting:
1. Match surface material and render engine.
Make sure your surface materials match the render engine.
The Iray render engine works best with Iray materials. The 3Delight render engine works best with 3Delight materials.
If the item is newer, Iray materials are usually the default. You can get some unusual effects if the wrong material set is loaded. For Genesis to Genesis 8, the materials are usually found in the same folder as the content.
2. Quality in, quality out.
The type and quality of the surface materials will influence the quality of the rendered image. Newer figures and materials often result in a better render than earlier ones.
3. Pay attention to your lighting.
The lighting is an important part of the render equation. The quality of shadows and contours are impacted by the type of light used and the placement of those lights. Darker renders take longer and result in more noise if the render time is too short.
4. Choose the right render size.
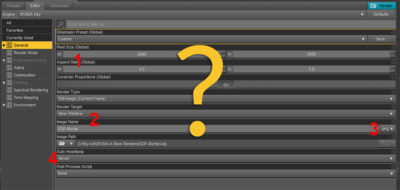
The size of the render will influence the length of time the image processes. You could render at 6000px on the longest side with a fast computer and graphics card. However, this may cause problems for slower CPUs and less powerful graphics cards.
I render everything with the longest side at 3000px. I then adjust pixels/inch and re-size in Photoshop. That process is covered in the render video in the Intro to Daz Studio course.
To speed up your testing, you can also test some renders at small sizes, like 500px on the long side. These process quickly and can give you an idea of what the image will look like. See how they look, and if you are not happy with it, bump up the size, perhaps 1000px, and render again.
5. Utilize the settings on the Render Tab.
There are lots of setting to cover here, so I created a PDF with my own render settings to get you started.
Members of Intro to Daz Studio will find this PDF on the resources page.
Everyone else can grab a complimentary copy of my Render Settings PDF here!


Leave Comment