How to Get Rid of Fringing After Extraction

Making selections in Photoshop is not the easiest thing. Even when a selection is good, there is often an outline around the subject you have extracted, like a white fringing.
There are a couple of things you can do to overcome this. I will use the images below, which are from Pixabay, so you can download them yourself and practice with them.
Before and after – notice the hair:
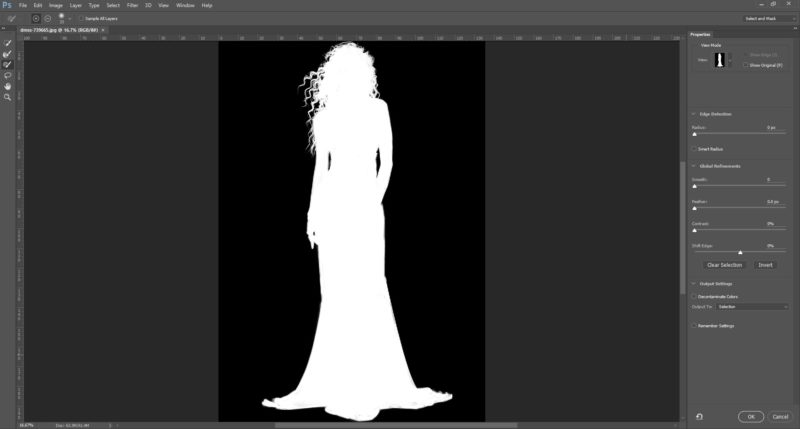
To start, I made a rough selection of the woman in the image, using the Quick Selection Tool.

I refined this using Select & Mask, which is a feature brought out with CC 2015.5
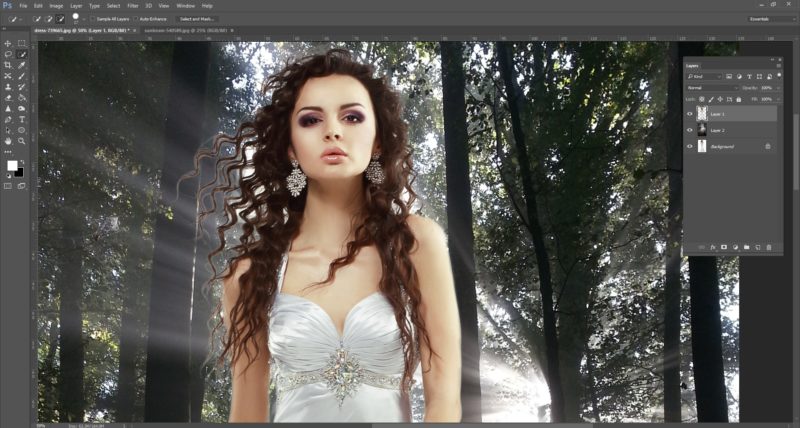
I added the forest image underneath the extracted woman.

The selection itself is pretty good, but you can clearly see white fringing around the edge and this is especially notable on her hair.
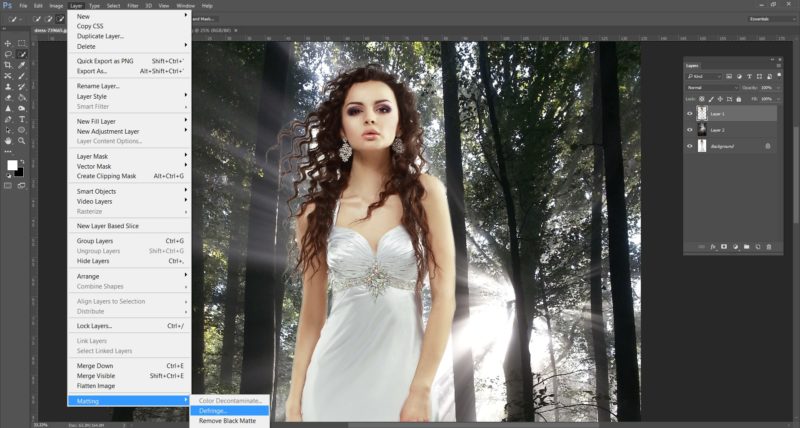
There is an option in Photoshop to help overcome this. Go to the Layer Menu, down to Matting, and then select Defringe.
An option box appears where you can put in a pixel value for defringing. I usually try anything from 5-20 pixels. For this example I am going to try 20.
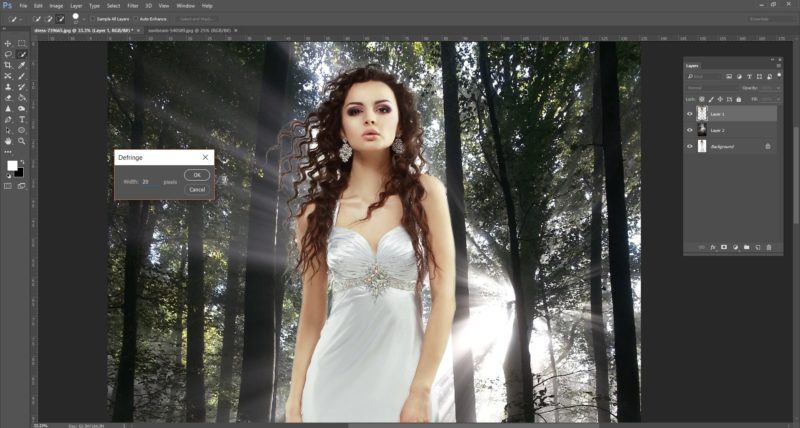
If you compare the image below to Image 4, above, you can see that this has helped to remove some of the white.
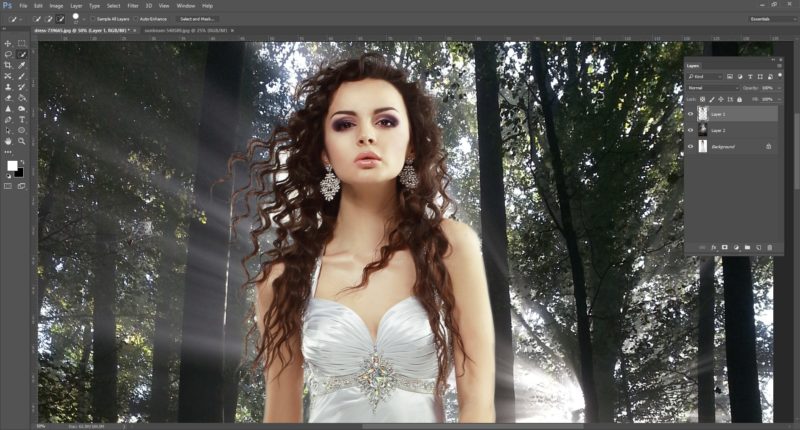
To refine things I make use of Blend Modes. If a layer is set to Multiply Blend Mode it will essentially knock out white pixels in an image. We can see this if we duplicate our extracted woman layer and set it to Multiply.
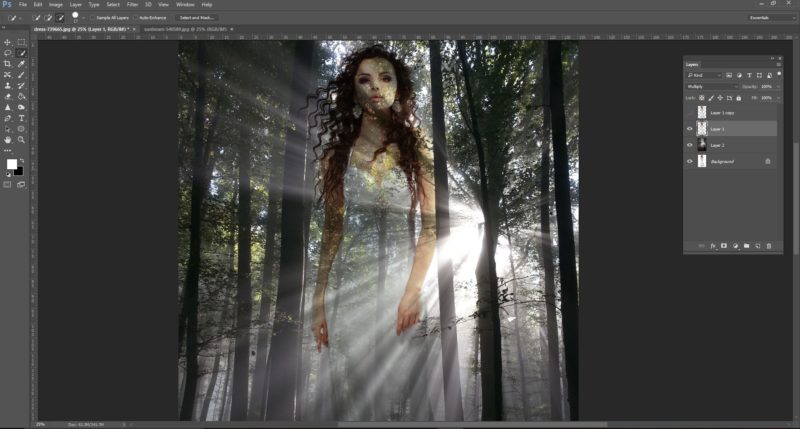
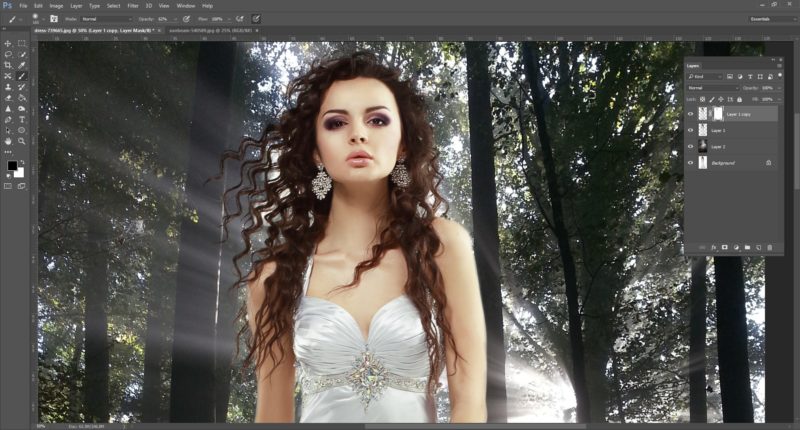
The trick here is to have 2 copies of your extracted image. One in Normal Blend Mode and the one below in Multiply Blend Mode. Then add a Layer Mask to the top layer. On this layer mask, use a soft black brush to paint over any remaining white fringing. You may have to alter the opacity of your brush. I used an opacity of about 50% for most of the image.

Taking a closer look, you can see that the white fringing has now been removed.
Important: If you are extracting an image from a dark background you may find black fringing. In this case use Screen Blend Mode instead of Multiply, since Screen Blend ignores black pixels.
Learn More About Extractions:
Get instant access to 4 tutorials on extractions! Now Only $36 $7!
Yes, I Want to Improve my Extractions!
Premium Members, you already have access to these tutorials!
Access this tutorial, plus 143 more: Join Base Camp!
Access our entire library of Base Camp Photoshop tutorials for life!
Join Base Camp!Already a Base Camp or Summit Member? Log in to view this!


So useful. Thanks Caroline! I knew about the defringing but the multiply blend mode is genius.
Caroline, I love your extraction tutorials! Thanks for all the tips, you are a great instructor. I’d like to see this one in video if you have the time. Thanks again.
Great combination of techniques, thanks.
Thanks Caroline, I’ve been struggling with this issue, no matter how good I think my extraction is. I will certainly be using this!
nice lesson Caroline,
I will be doing this.
Thanks Caroline. Defringing option sure saved my day. Was struggling with this bit for a while and voila here is your tutorial!
Very informative tutorial, thank you Caroline.
i needed this so much , thanks a lot <3